In the selection area, click on the “Items” area, then the item template with its two text fields (header, footer) opens.
Example of an item template
Header and footer text
You can open the header and footer text fields by clicking on the arrows and summarize a free text in the field that appears, or insert a text module with the F3 key (Abbreviation + F3 or F3 + choice from the text template administration).
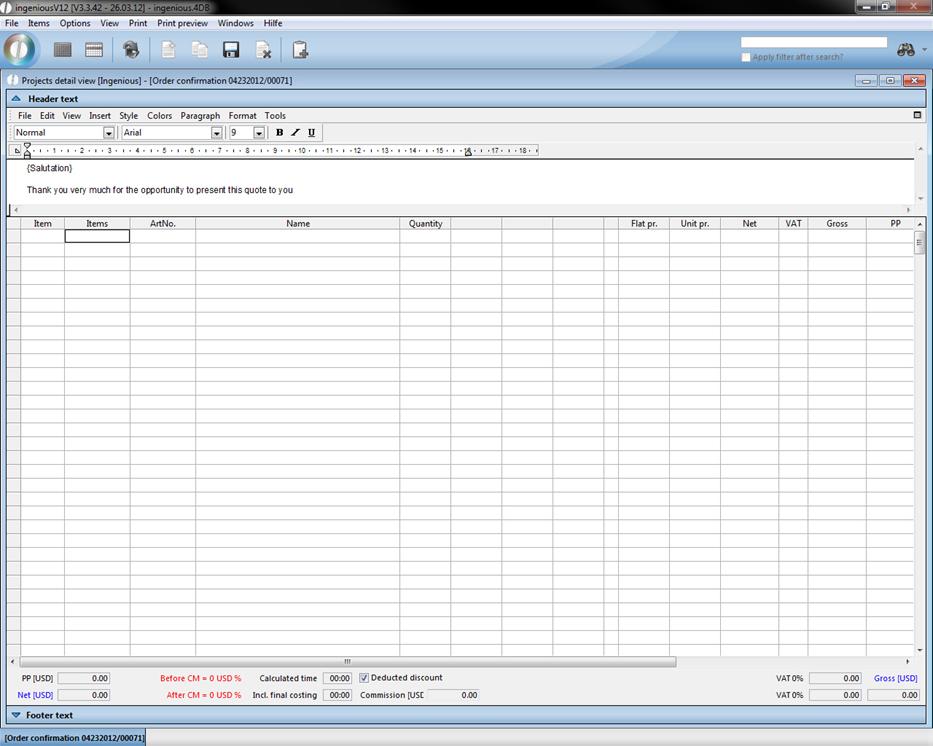
Header text of the project detail view
Direct invoicing item
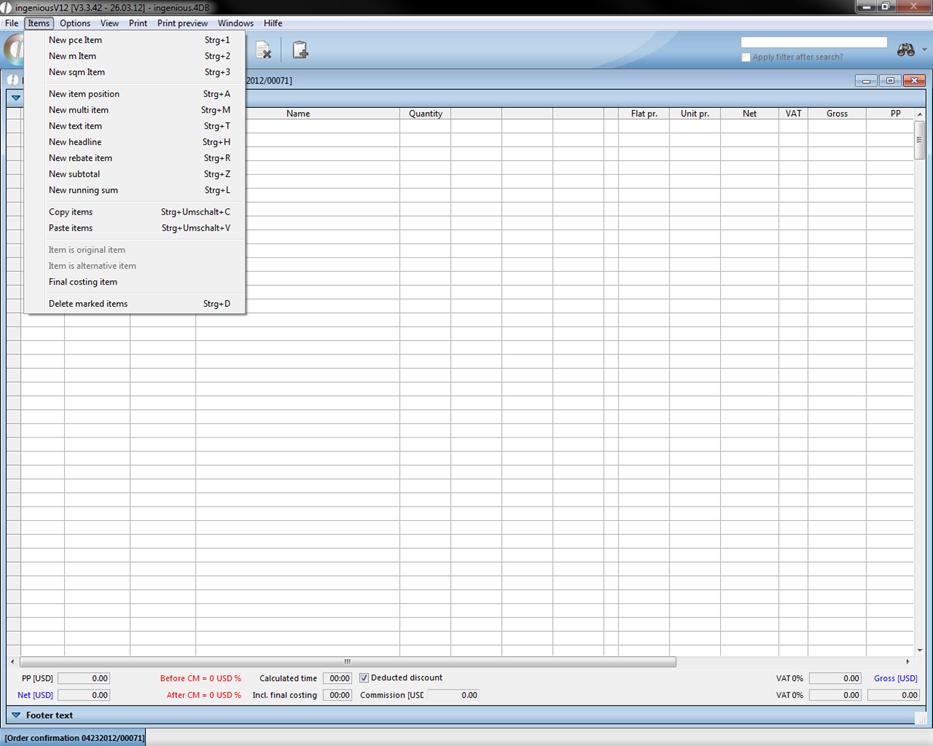
A direct invoicing item is an item that is not entered in the item catalog because it is not often required for example, or does not belong to the normal company product line. A direct invoicing item is summarized in the item template with the menu point “Items” or through the direct entry of the item template. There are three different categories according to sales units.
Parts price-item
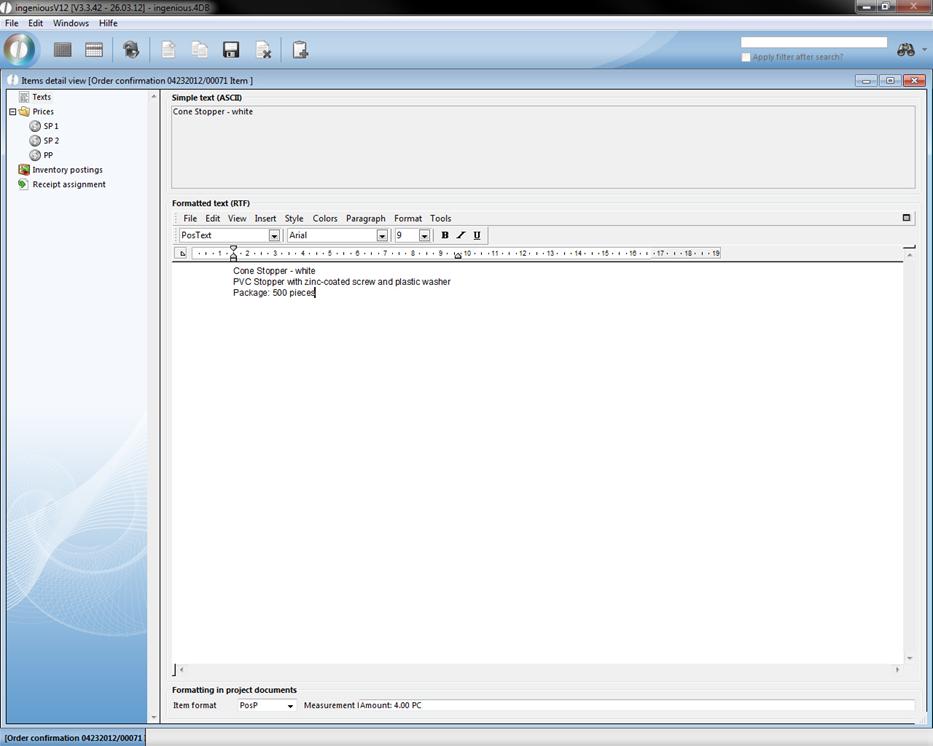
Select the item, “New direct invoice parts item” in the menu, “Items” in the Ingenious.V12 window. The window “Item detail view” opens in which you can describe the item and determine the sales and purchase prices. Here the entered prices are counted per piece.
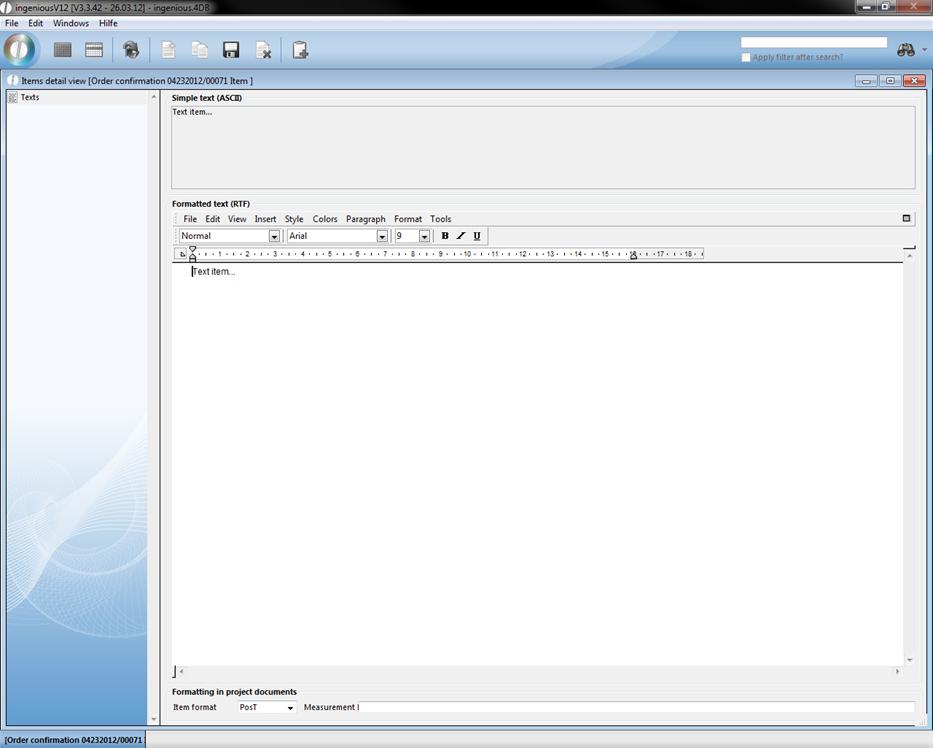
Summarize parts item position texts
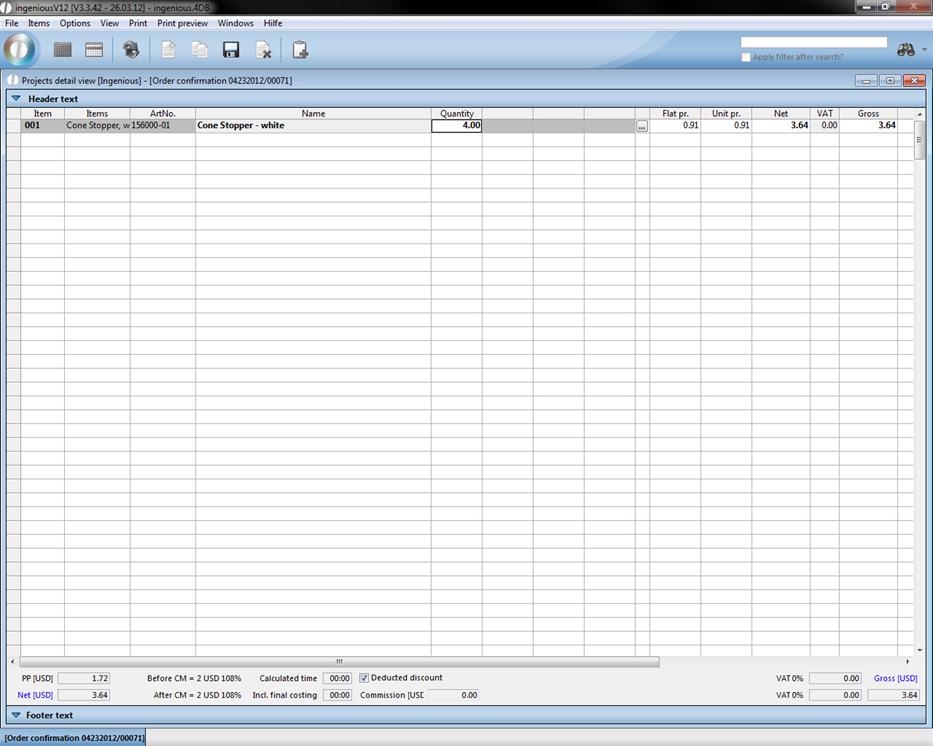
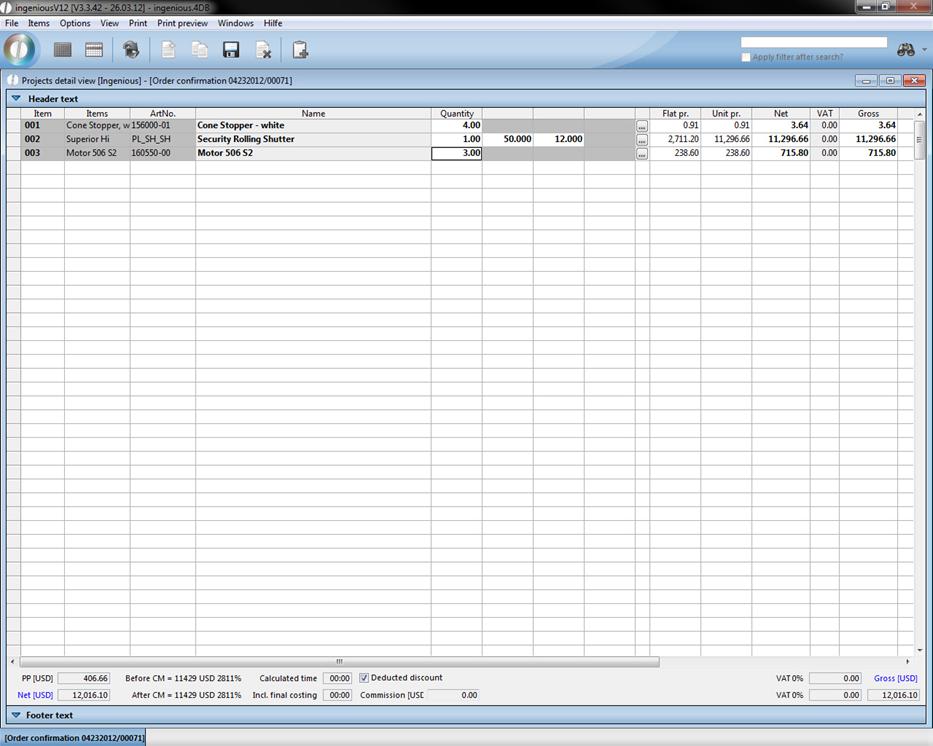
In the lower part of the window, you see the item format and the measurement line. According to the selection of the item type (item format), the suitable dimension line is entered next to the corresponding item line. This is adapted by us according to your wishes in the program settings.
In the document printing, the measurement lines are canceled by choice. In our example, the measurement text appears: Amount: 4.00 PC that correspond to the the given item values.
Nevertheless, you can also enter the prices directly in the table. If you would like to open the window once again, it is sufficient to double-click in the “Description” cell of the desired item. It is easier to enter a parts item, in that you enter the number of pieces in the corresponding line in the “Amount” column. A direct invoice parts item is automatically entered, which you can work on as described above.
Meter and square meter items
You collect goods that are calculated after unit of length with “New direct invoicing m-item” and the item according to surface area with “New direct invoicing qm item”. After entering the item data and closing the detail view, the positions appear in the project document.
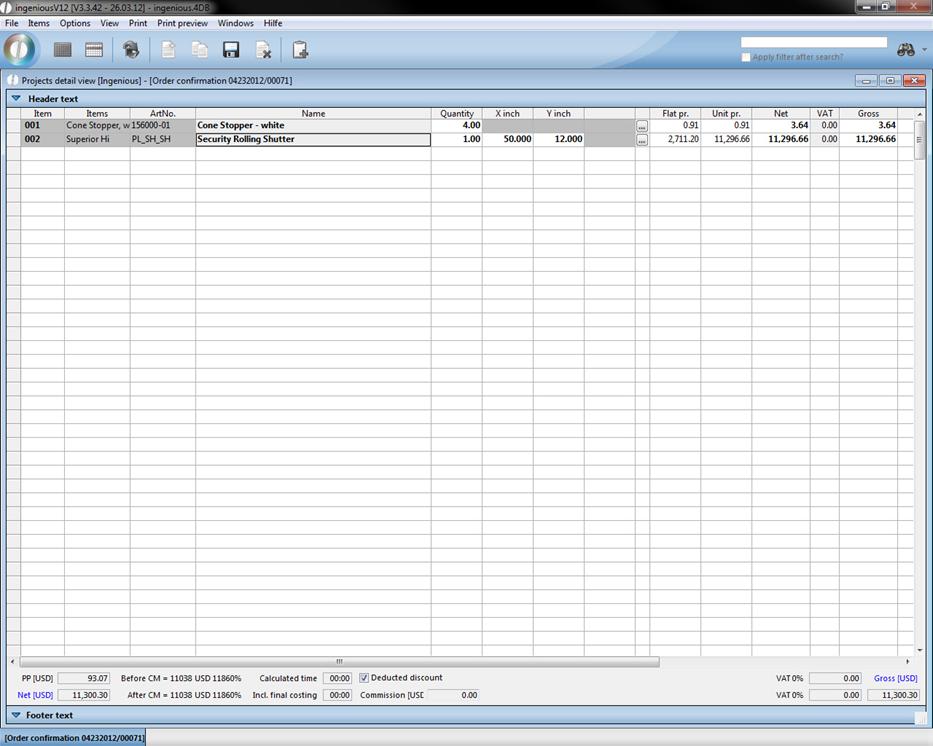
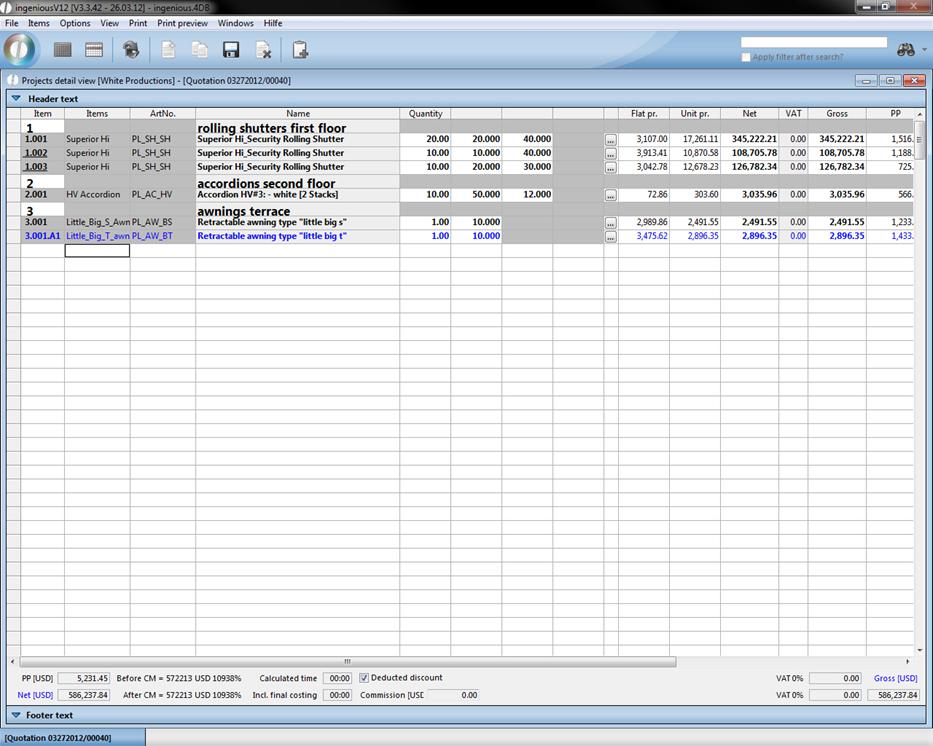
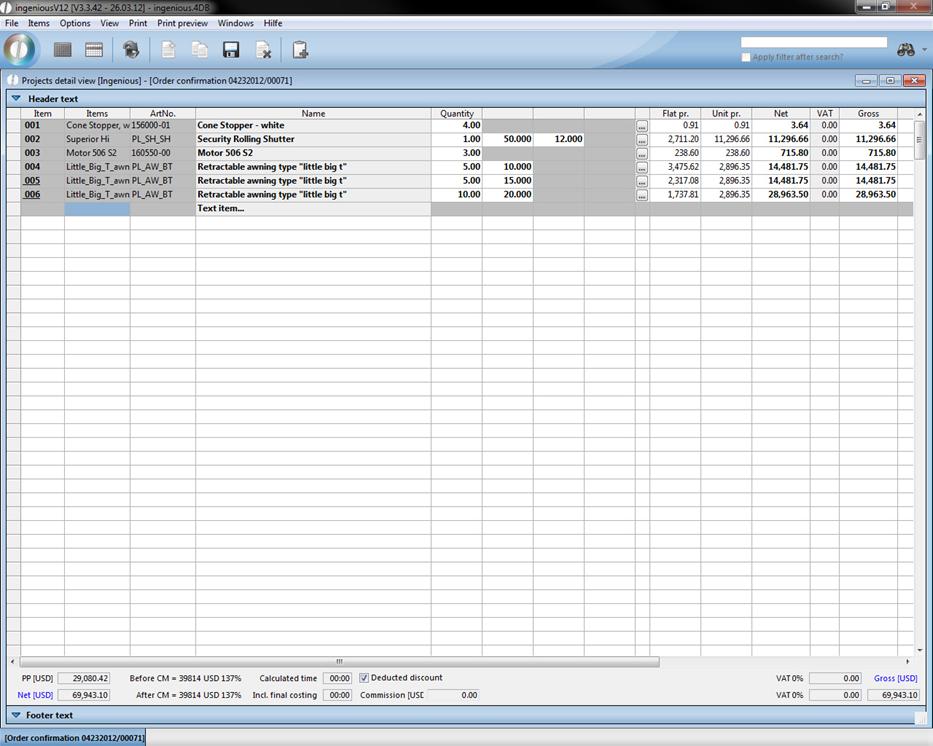
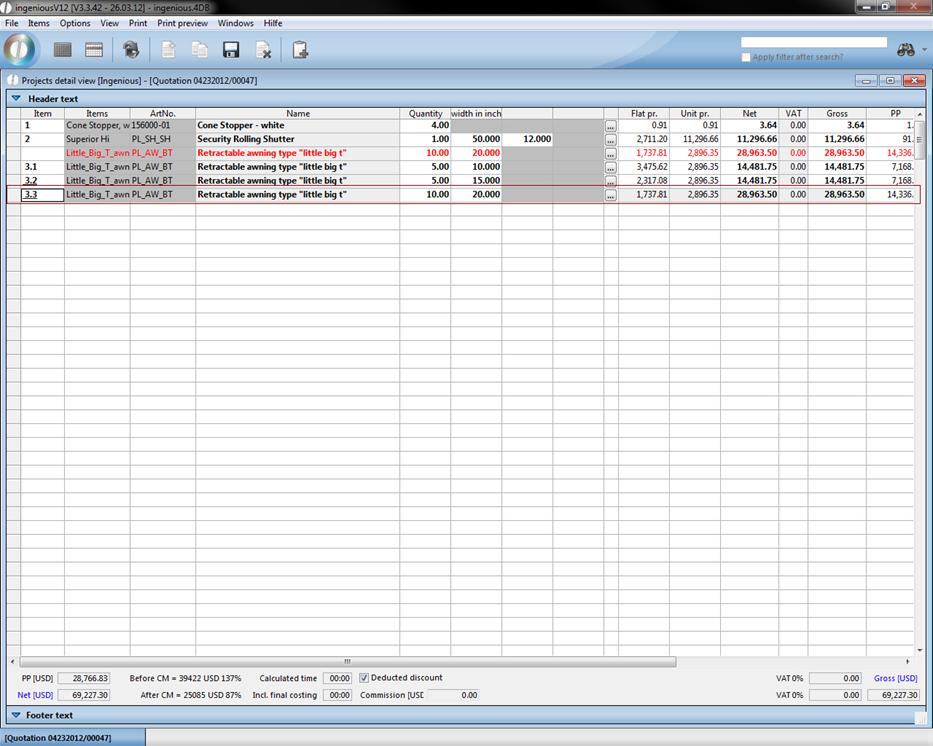
Project detail view with items
The completion of the amounts and lengths automatically leads to the new calculation of the sums. Here you can also enter the items directly into the template. For a meter price, you enter the length in the “X cm” column and for a square meter item, you insert the width in the “Y cm” column. Ingenious.V12 will automatically choose the correct direct invoicing item.
item position
Frequently used typical company items are collected in the product catalogue. In order to insert such an item in your project document, enter the item number or the matchcode. The item is transferred from the catalog. If you would like to search for items with the joker character or product groups for example, choose “New item item” in the “Items” menu or alternatively enter * directly into the respective blank line. The item catalog is opened and with a double-click, you can select an item with the search function or by entering a matchcode.
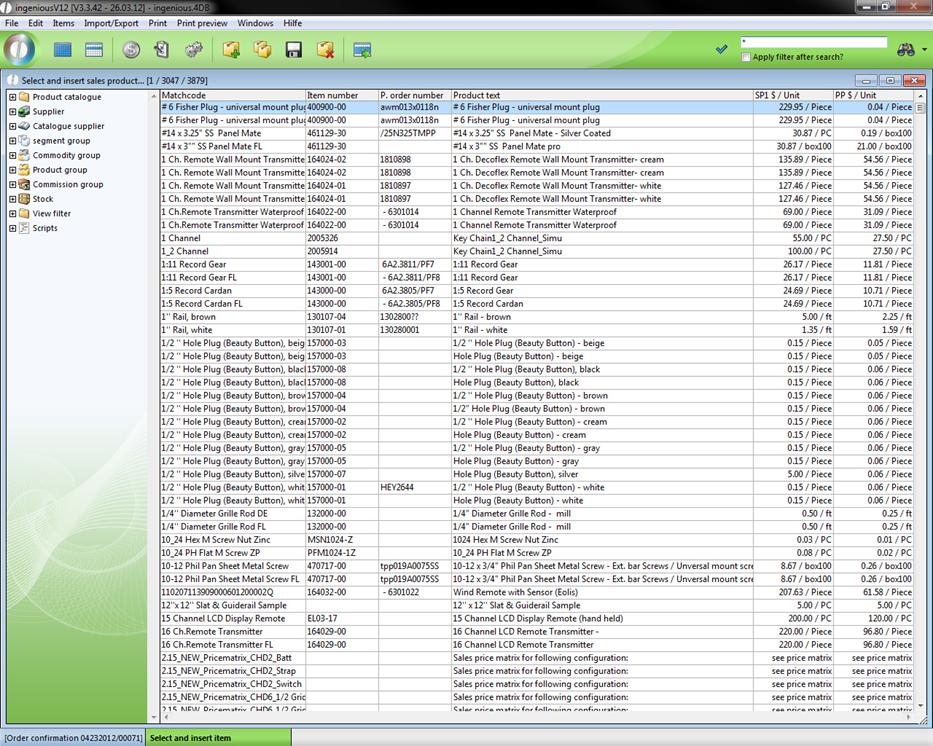
By using an item item, you save yourself the task of entering texts and prices and only the number must thus be added. Another advantage of item items is that they provide the possibility to control stock and to post stock movements. With given necessity, you easily receive an overview of the supplies.
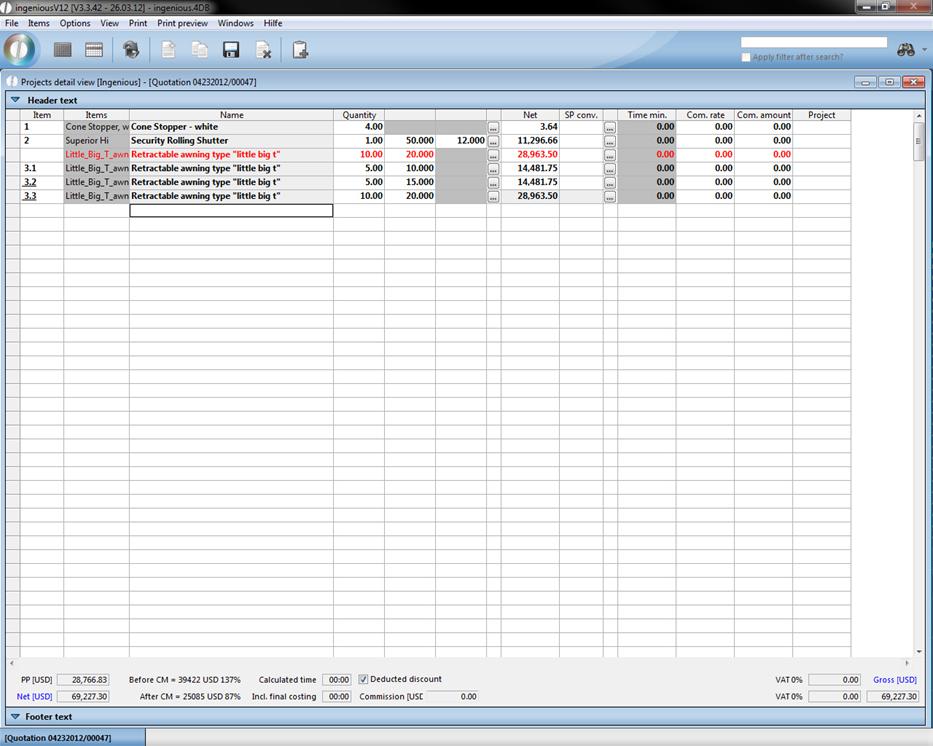
Multi items
A multi item contains a service item that is needed in different dimensions. The item becomes selected according to “Items- new multi-items” with the matchcode or the item search ![]() . Afterwards the respective number of the single dimensions is collected in a template.
. Afterwards the respective number of the single dimensions is collected in a template.
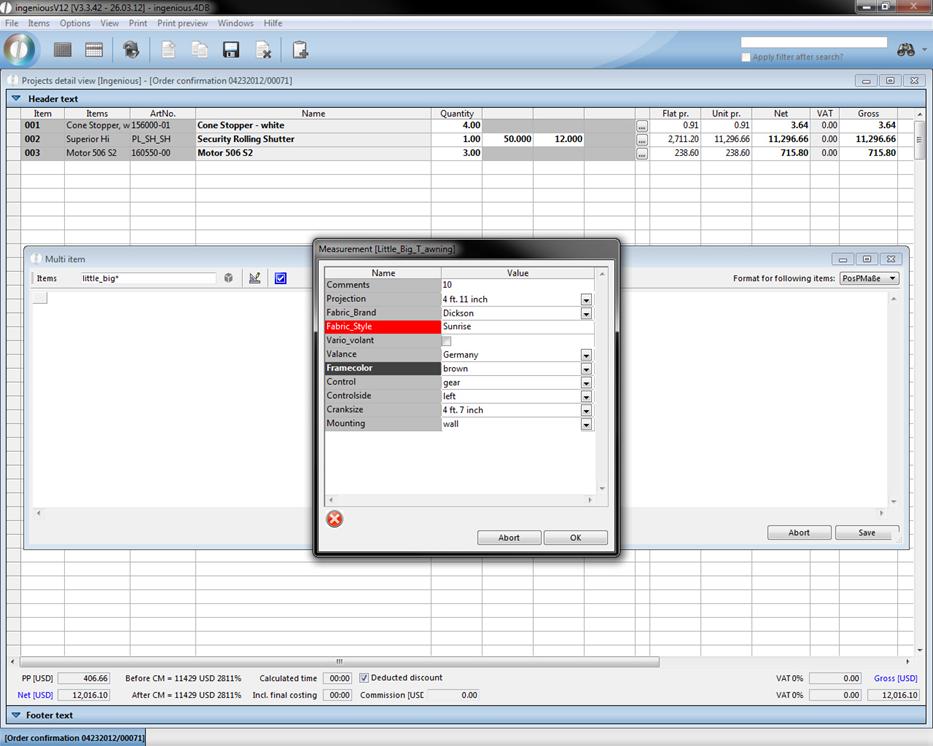
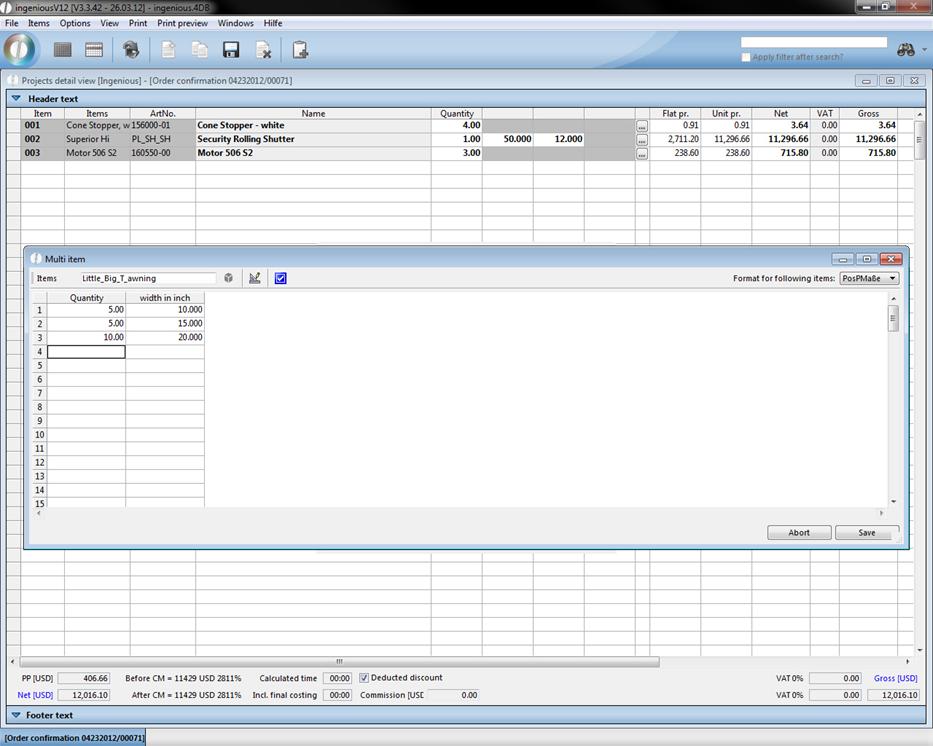
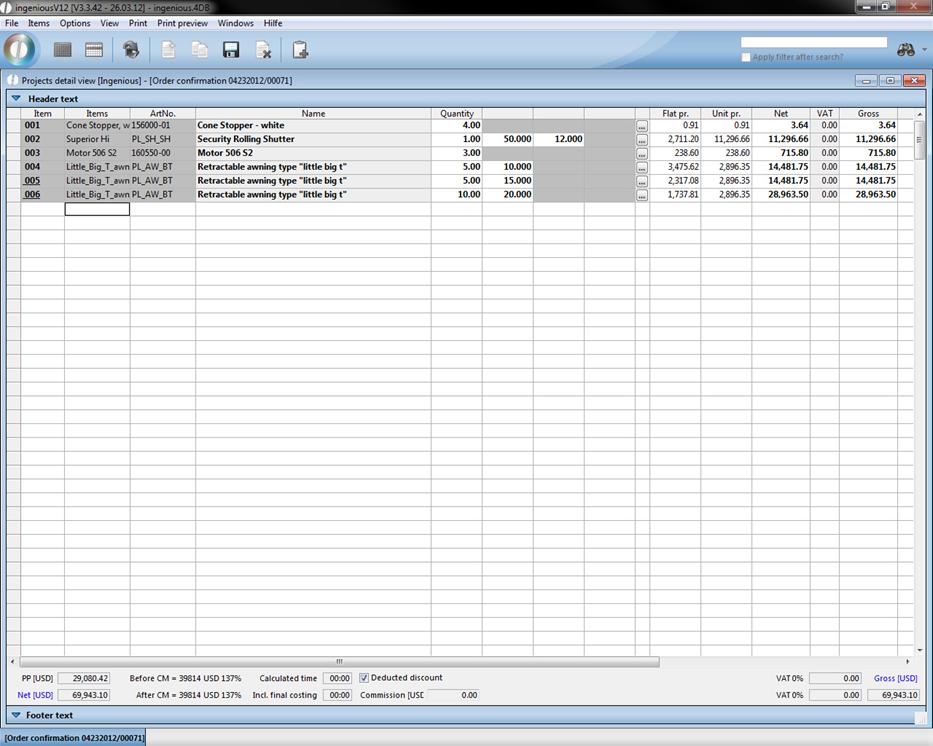
Ingenious.V12 inserts the item in the project document exactly as often as different measurements were given. In the printed document, the item appears only once with its description and the following items contain only the dimensions.
Text item
Additional explanations or tips can be entered into a text item. Go to the place in the document where the text should be inserted and choose “Items - new text item”.
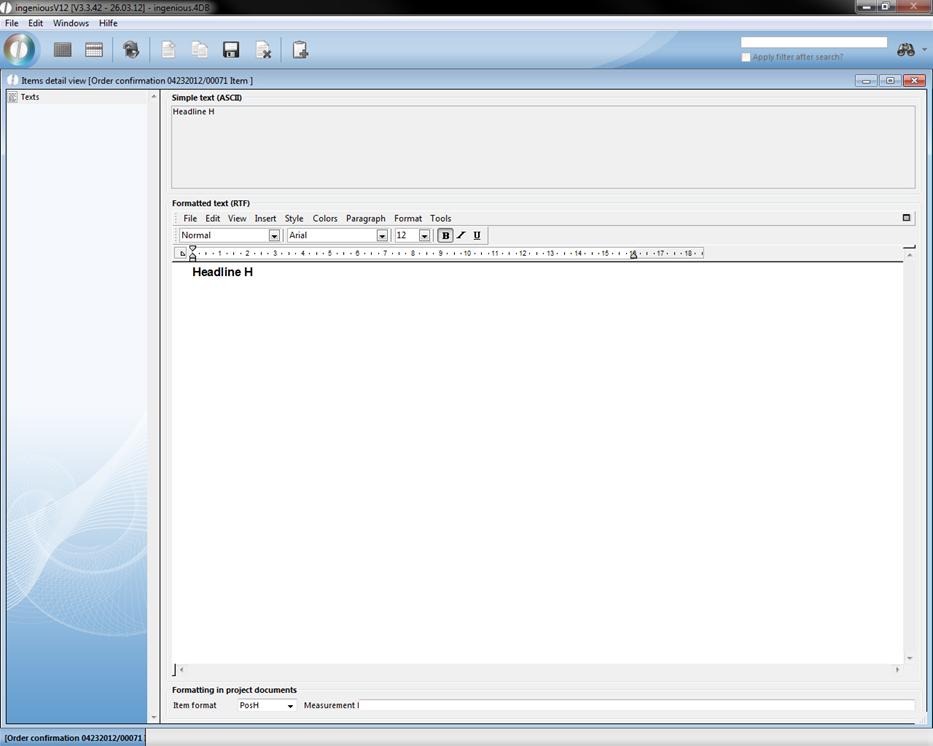
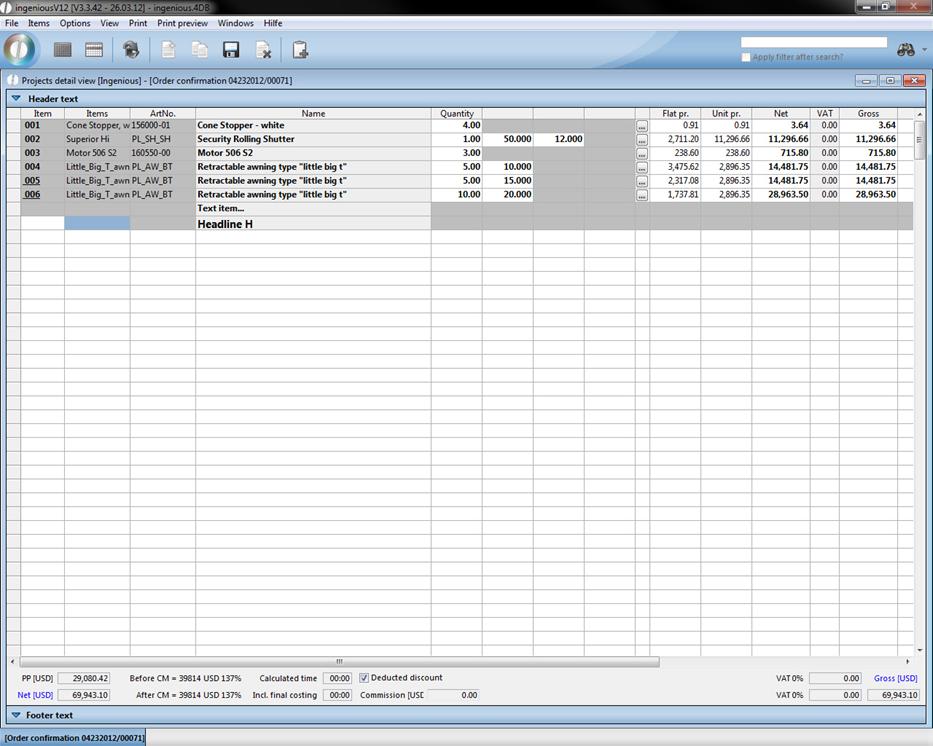
Heading
In order to create your document more clearly, you can work with headings (Menu: Positions - New heading). You can insert and edit these like a text item.
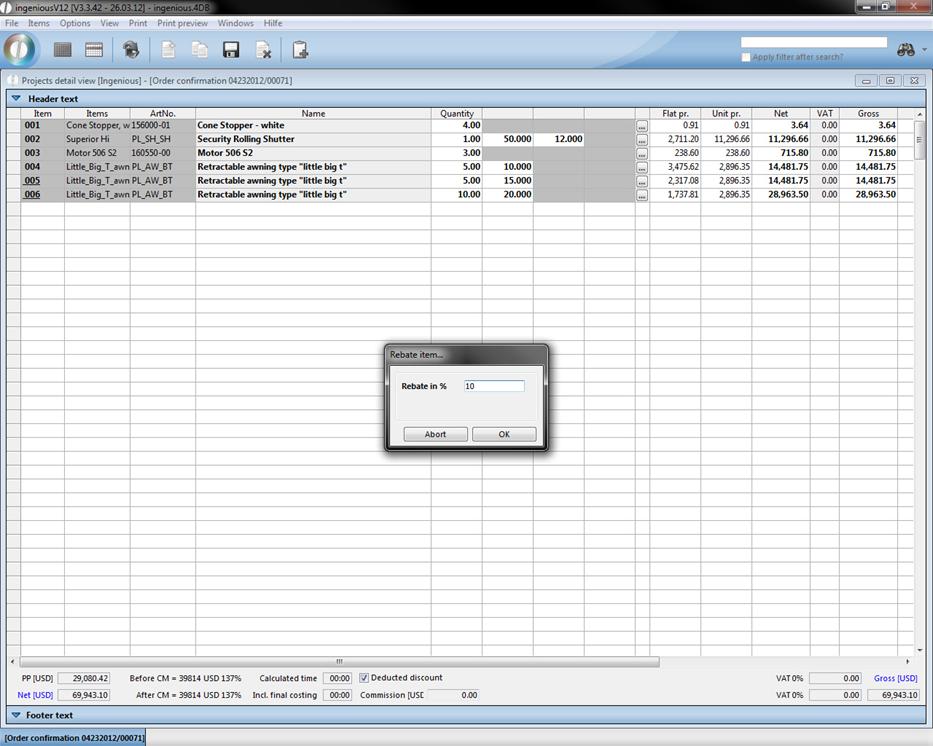
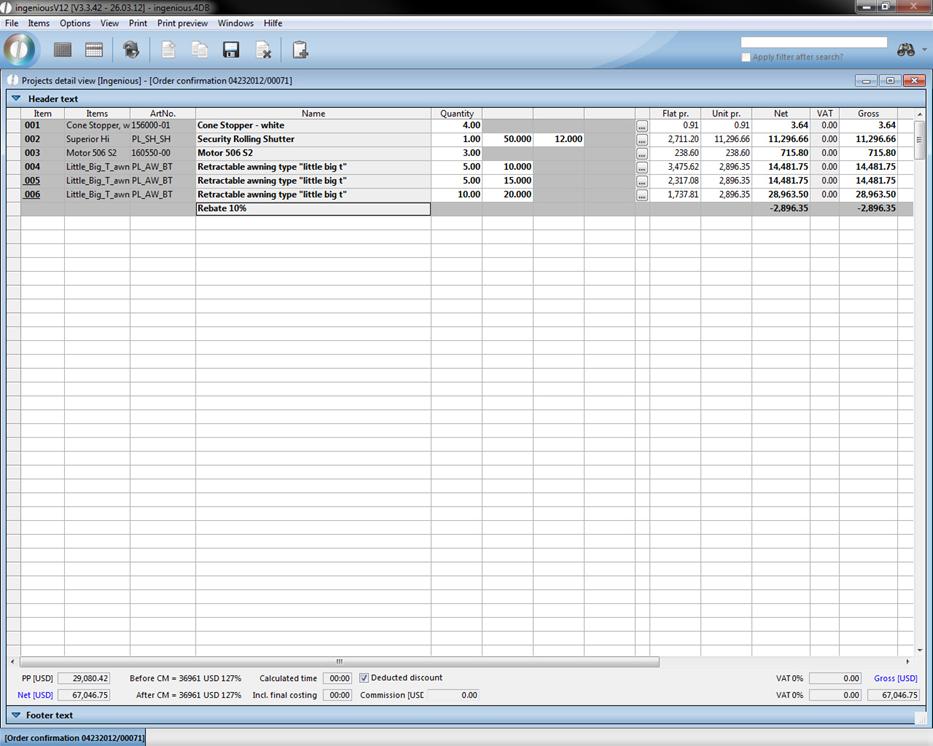
Rebate item
You can grant a rebate on single or several items, or on the whole order value. Pay attention to the fact that you insert the rebate item in each case directly under the line from which the price value should be drawn. If for example a text item stands between both items, no rebate can be calculated because in this line no price is included. With rebates of an item, you enter the rebate item directly underneath. Should several or all items be discounted, the sum must be determined beforehand.
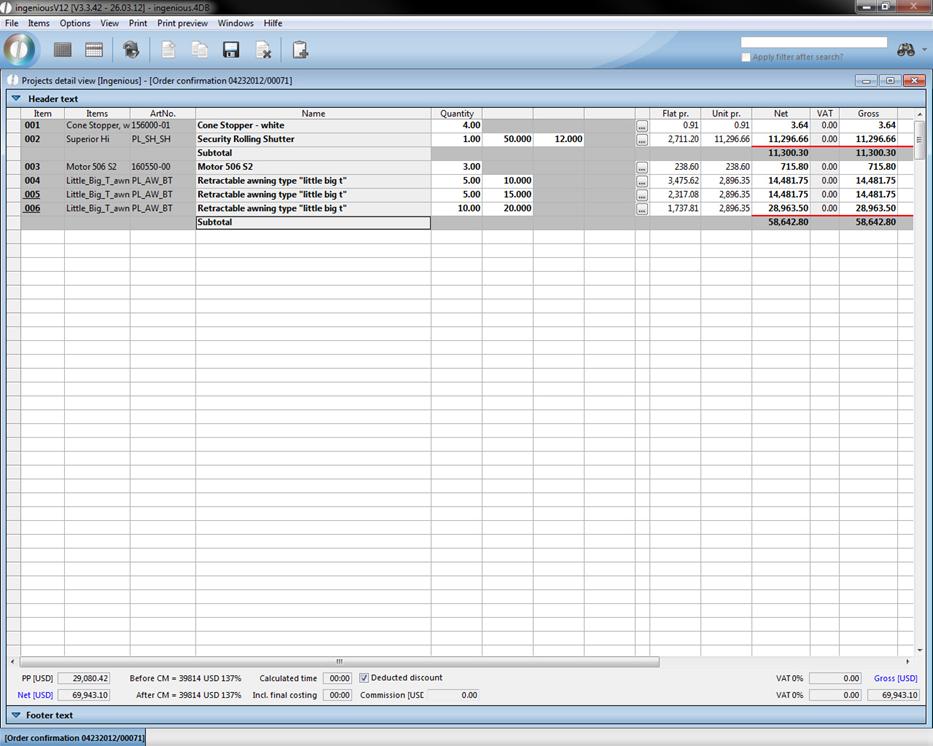
Subtotal
The subtotal (Menu: Items - New subtotal shows the whole price of several items in a category, i.e., divided by headings. A subtotal counts the fixed values together, up to the next existing subtotal, or if no other one exists, up to the first item.
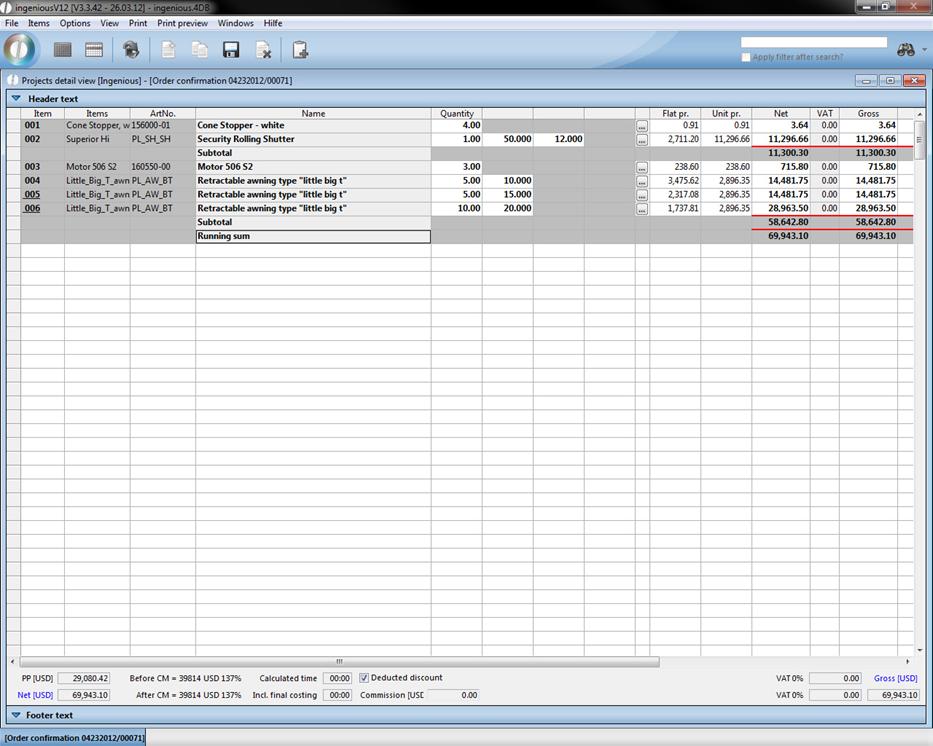
Running sum
The continuous sum (Menu: Items - New running sum) determines the total value of all of its existing items, no matter whether divided by subtotals or not.
Copy and paste items
The shortcuts Strg + Shift + C and Strg + Shift + V will help you to copy and paste (multiple) items. You can also execute this commands by using the menu “items”.
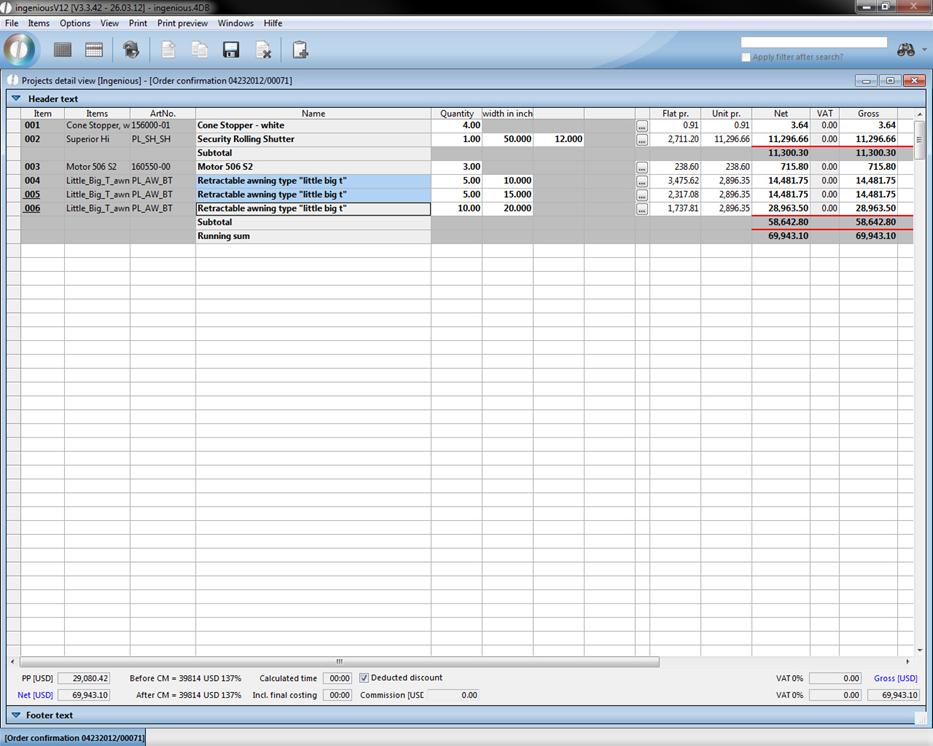
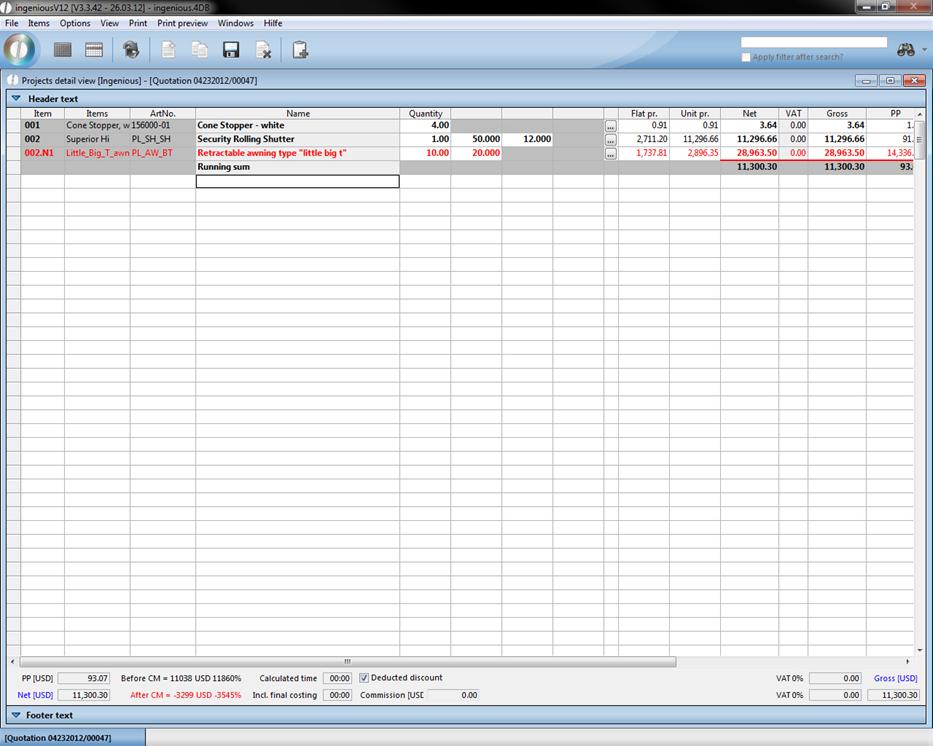
Example – selected items
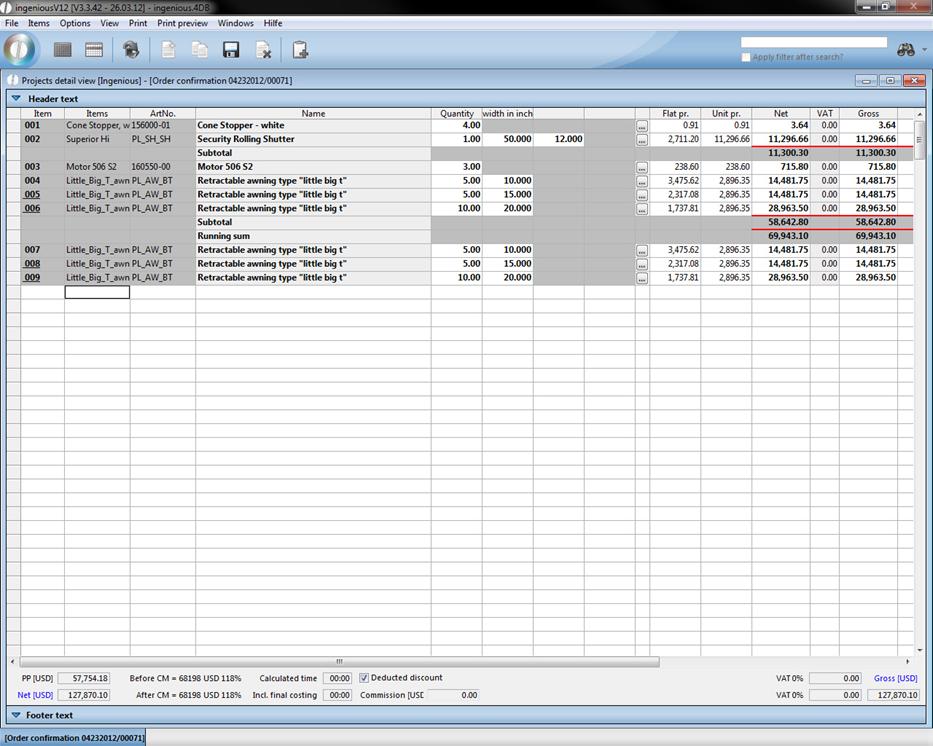
Example after paste the items
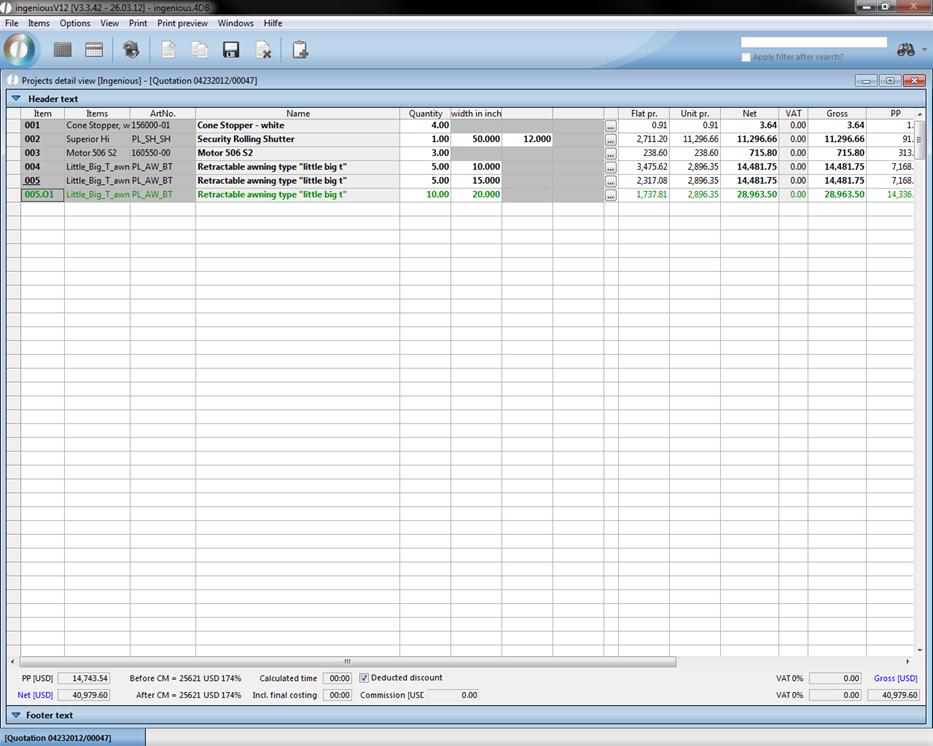
Original item
items that should not be included in the sums because they are perhaps only needed or recommended by you, but are not wished by the contact expressly, are shown as optional items, and indicated by the item number “O”. On the printed quotation, this is shown in cursive and with the “Option” script. In the project, this item appears green.
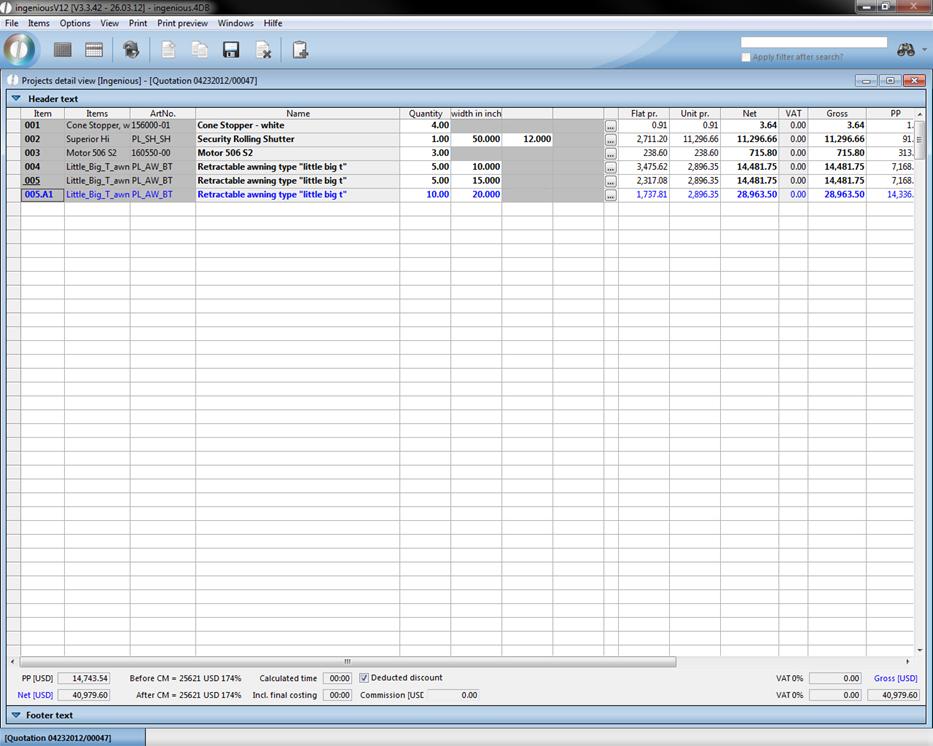
Alternative item
In order to offer the possibility to the customer to choose between different items, you can work with alternative items. After the first possibility, you enter several other items and then in “Items”, select “Item is alternative item”. This item is shown in the project in blue and on the printed document in italics. The item sum does not go into subtotals, continuous totals or total sums. In the item number “A” indicates the alternative item.
Post calculation item
In some projects, additional goods are used because of false dimensions and cannot be billed to the customer. These items should still be assigned to the project in order to be able to issue correct reports. In the project, enter the item and under the menu “Items”, choose the option “Post calculation item”. The item is highlighted in red and the profit figures are corrected around this value. The total purchase price increases by the value of the additional item whereas the total sales sum keeps the original order value. Because the mistake is not the customer’s fault, the additional expense is not billed to them.
Deleting items
You can delete incorrectly entered or no longer required items by marking the selection, “Delete marked items” under the menu “Items”. In order to prevent an inadvertent removal, one more security query appears. Pleas confirm by clicking on “OK” in order to finally delete the item.
Manual item numbers
In Ingenious.V12 sequential item numbers will automatically be assigned to the projects. However, you also have the possibility to change this numerical order according to your own pattern. In the menu, select “Options” and click on “Manual item numbers”. The first grey item numbers provided will be unlocked and provided in white. You can then insert your individual numbering in the respective field, for example for service directories.
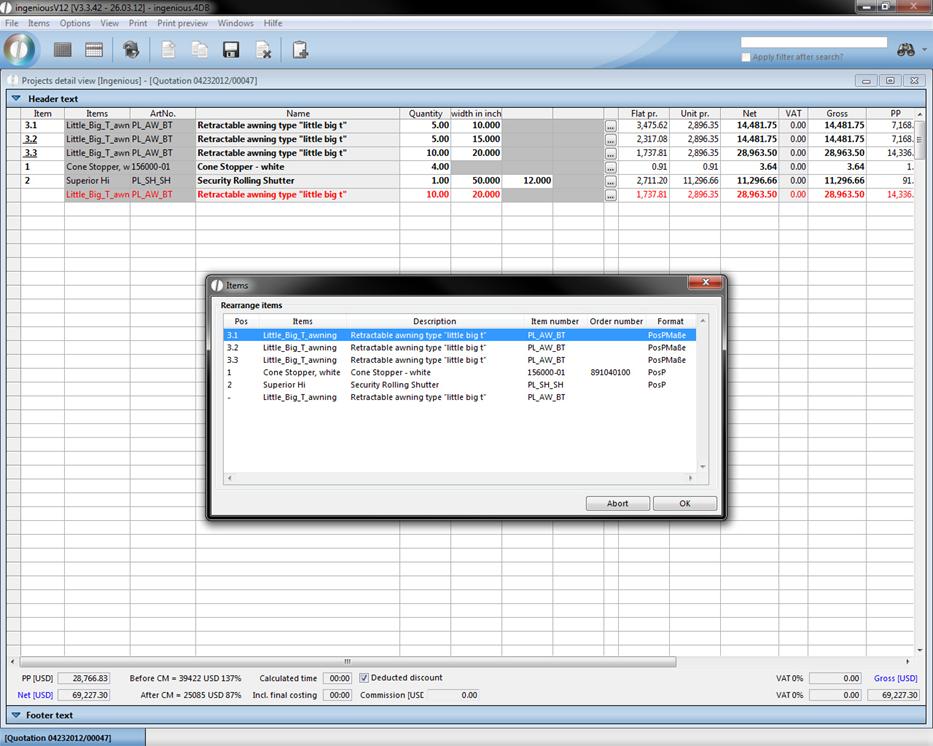
Rearrange items
Additionally you are able to rearrange items and change their presentation on printing (PosP = all item features will be displayed; PosPMaße = only the item measurements will be displayed). Just select “Rearrange items” in the menu “Options”. A window will open up, where you can move the items by drag and drop. 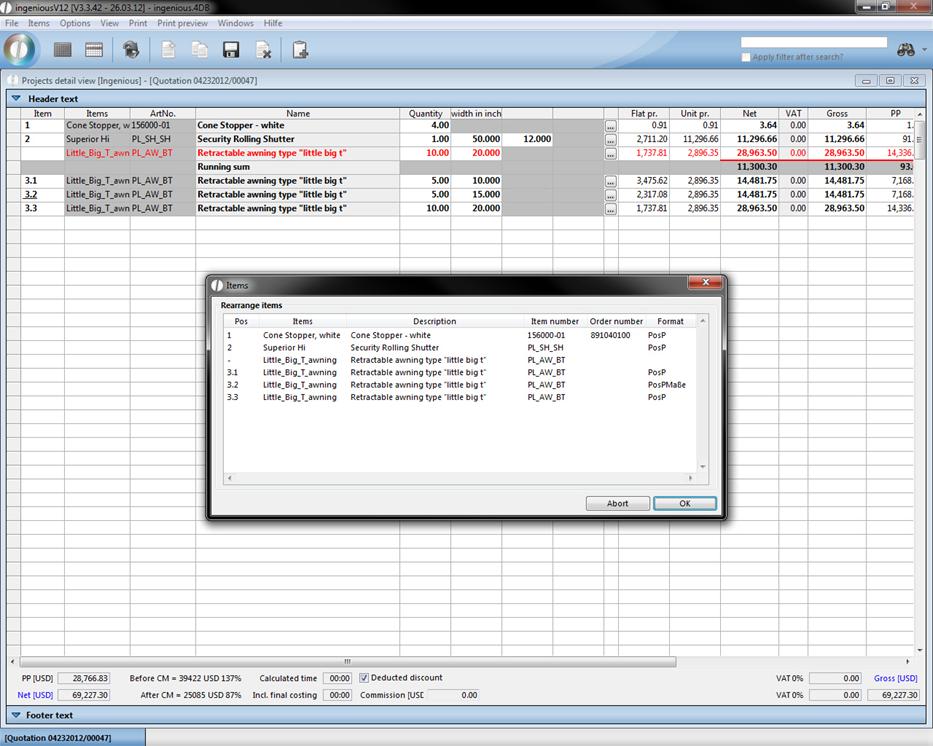
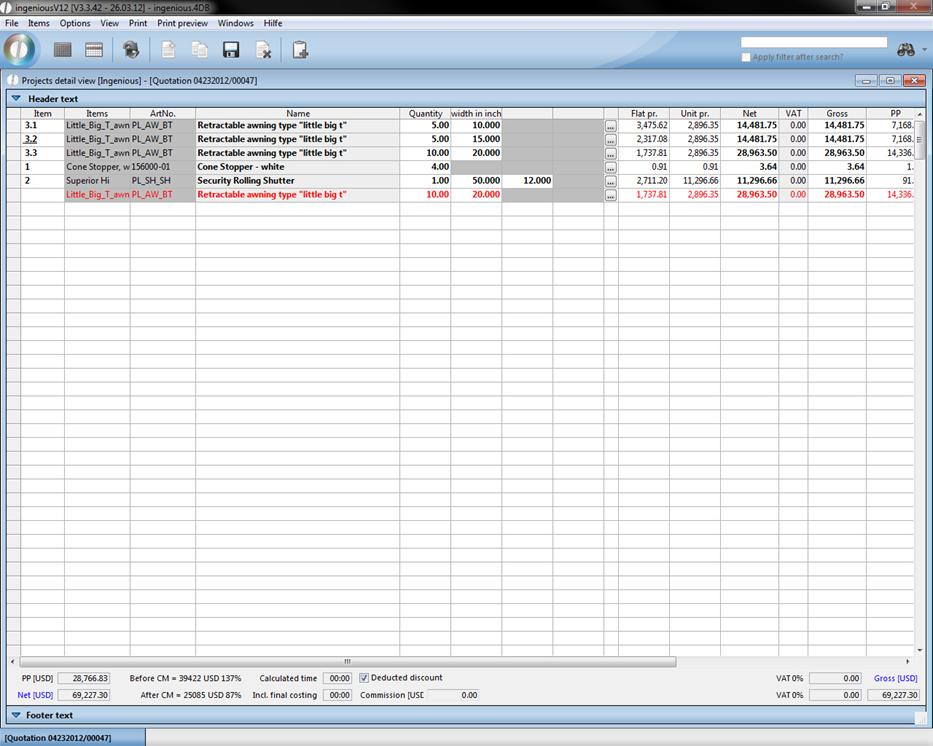
To change the display form for the print, reopen the rearrange items window and do a double click in the format column of the desired item.
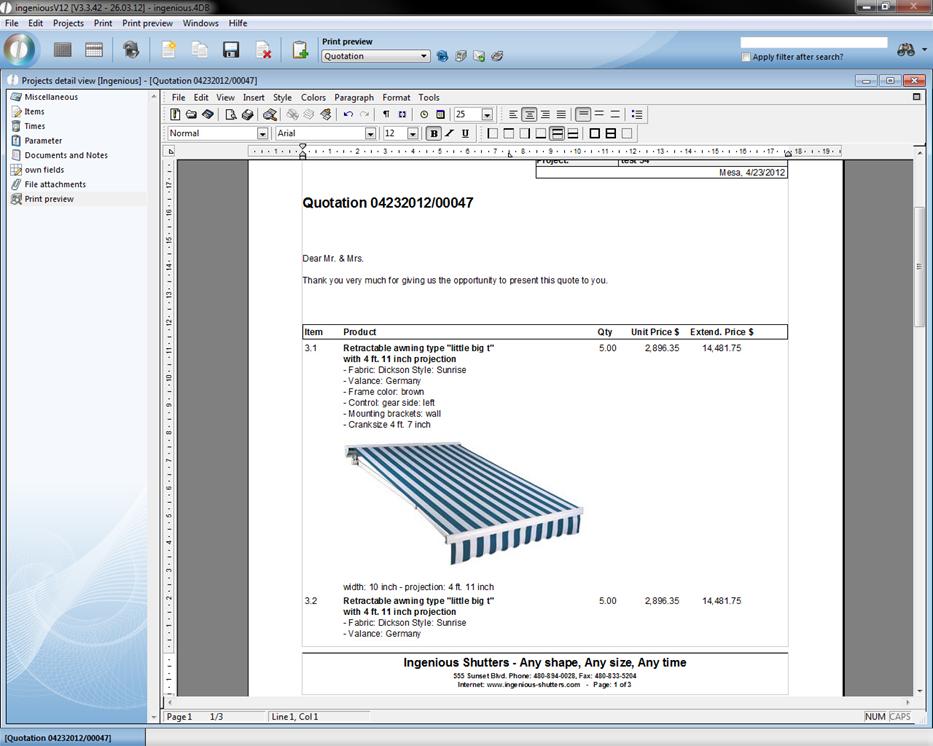
Preview of the item printout with PosP
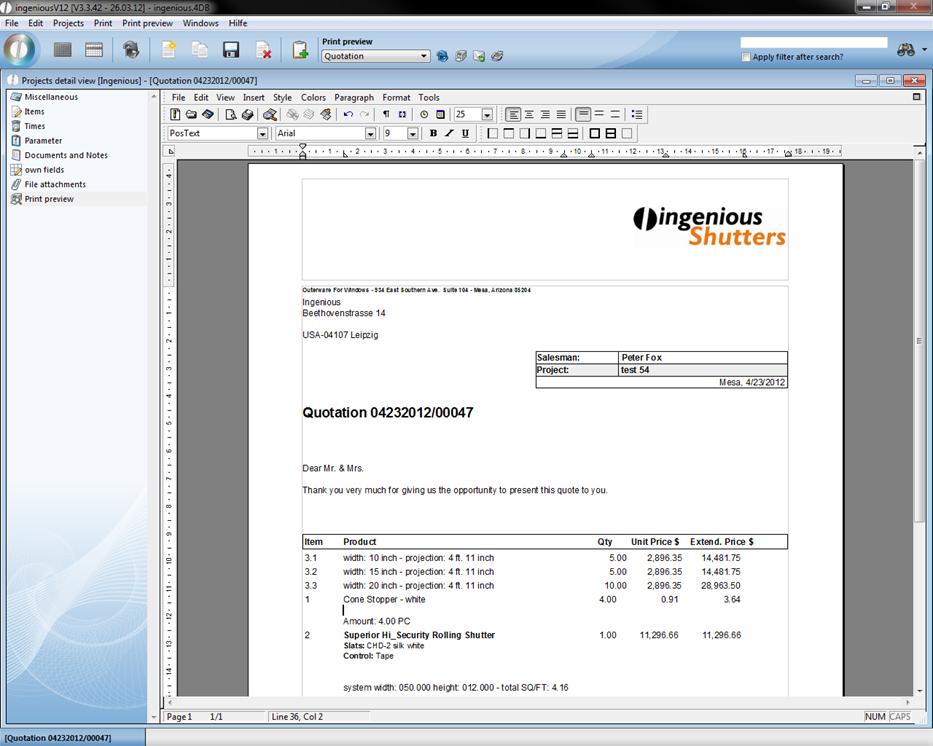
Preview of the item printout with PosMaße
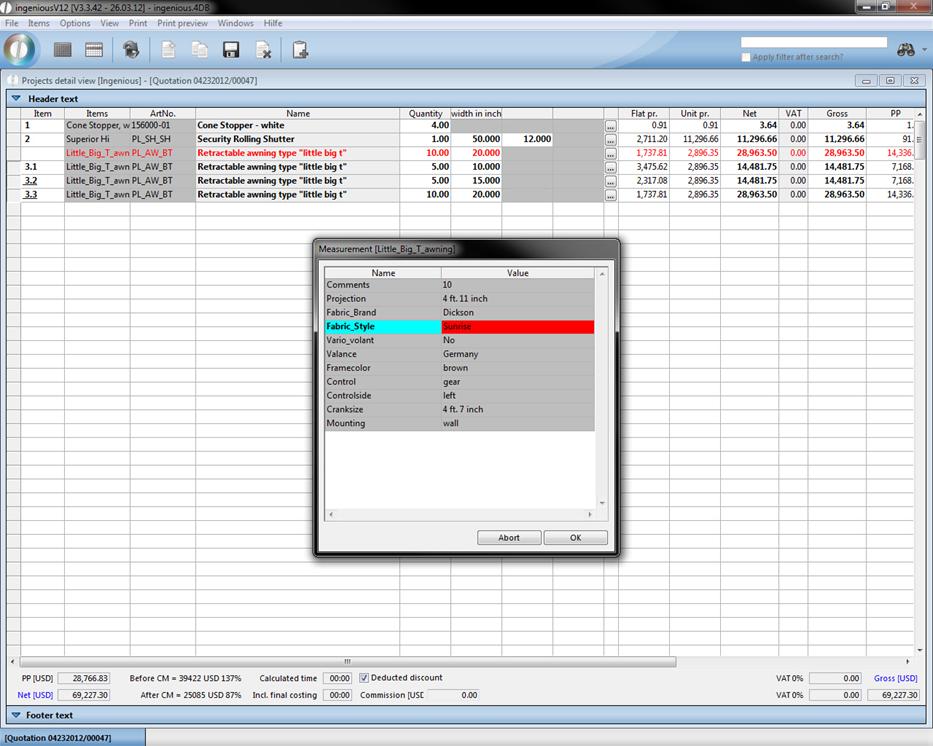
Editing measurement data
In the item view the measurement data of several of the same items can be changed all at once (practically by change / adaptation of multi items). In addition, only the desired items must be marked and the item, “Edit measurement data” in the “Options” menu, is selected. The measurement window of the first highlighted item opens. Here, the desired data can be changed and confirmed. The change is automatically transferred for all highlighted items.
Freeze sales price
When you freeze the sales price of items, the total price of the item remains constant, even if measurement, quantity, etc. are changed. Just select the desired items and click in the menu “options” on “freeze sales prices”. Now when you change the measurements of the item only the purchase price will be recalculate. Items with fixed sales prices have got light grey colored sales price columns. To rescind the fixation, you only have to click on the menu item “Options – freeze sales prices” again.
PrintPrjSum
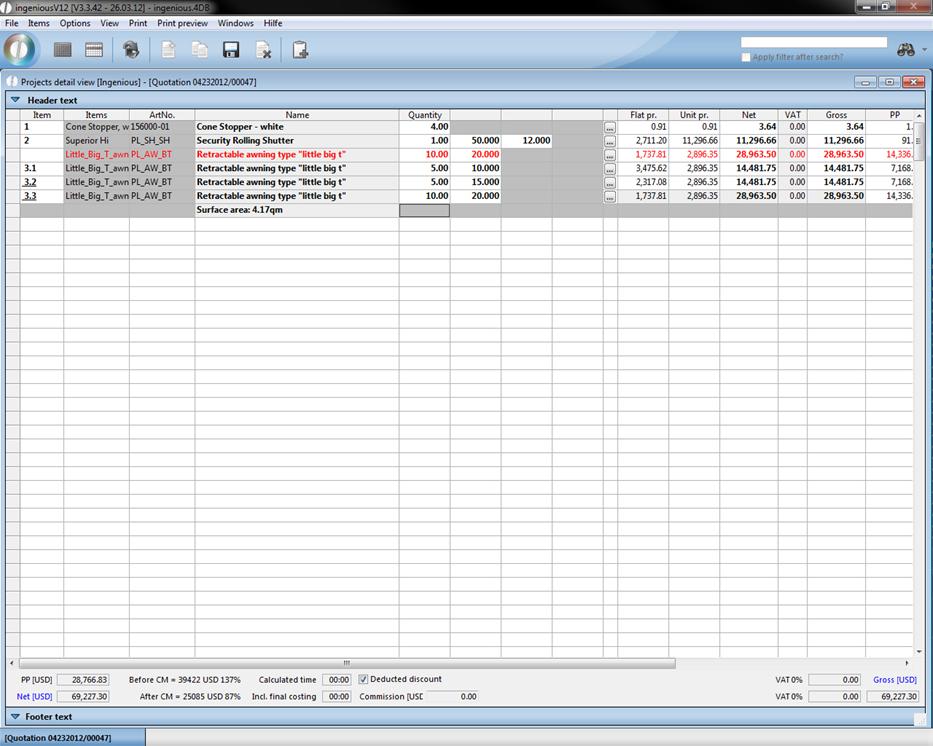
The PrintPrjSum function allows a sum evaluation of several positions all at once. For this, only one item has to be created in which the item description, PrintPrjSum with the desired calculation format occurs.
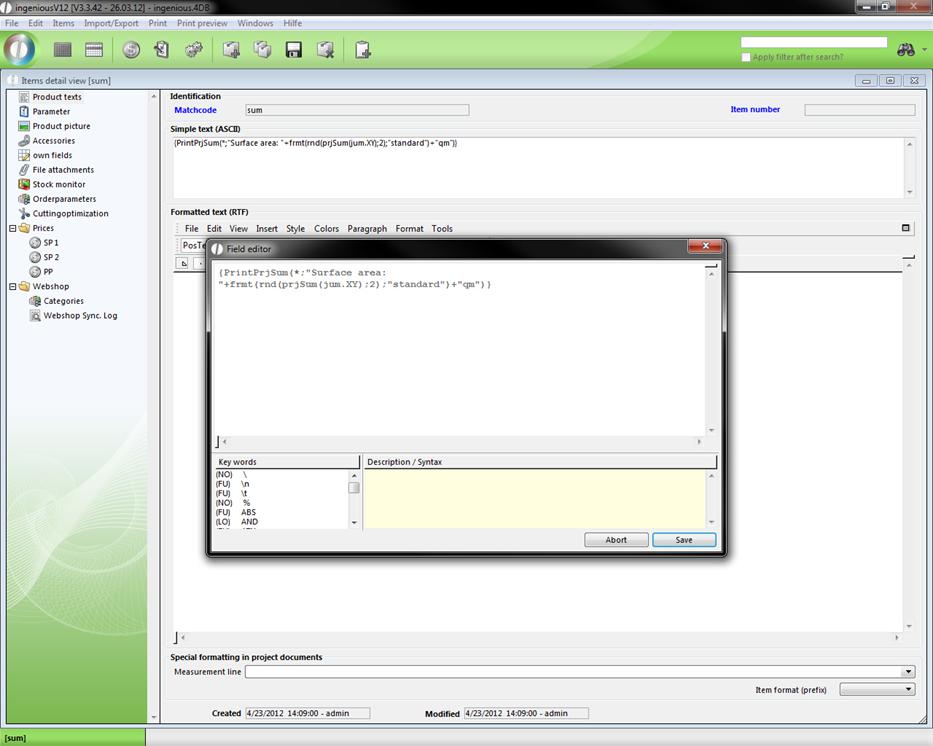
You will find different calculation formats as examples in the field editor (⇧ + F2).
Then in the position view a sum line can be inserted above the item.
Example:
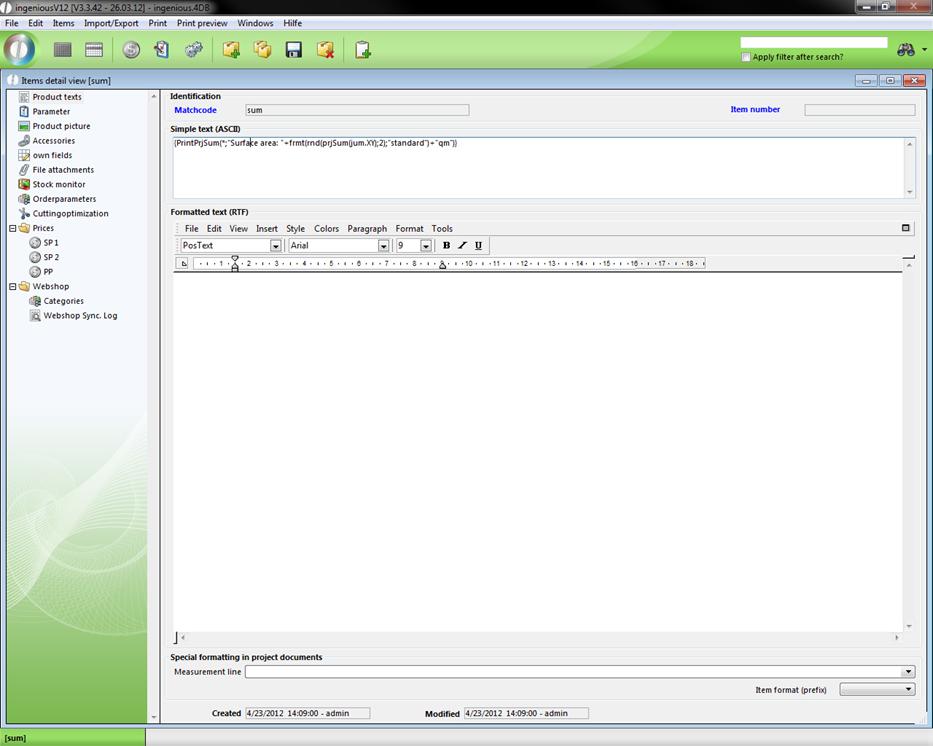
The surface area of all positions should be calculated. In addition, an item is created at first, for instance, with the matchcode “Sum”. Next, one enters the desired calculation formats in the field,
“Simple Text (ASCII)”:
{PrintPrjSum(*; “Surface area: “+frmt(rnd(prjSum(jum.XY);2);"standard")+” qm”)}
(calculate all items and round the surface areas and lay them out with two decimal places in the form of the surface area:0.00 sqm)
The formatting of PrintPrjSum can be changed with the text module management with the configuration of the system module PosT.
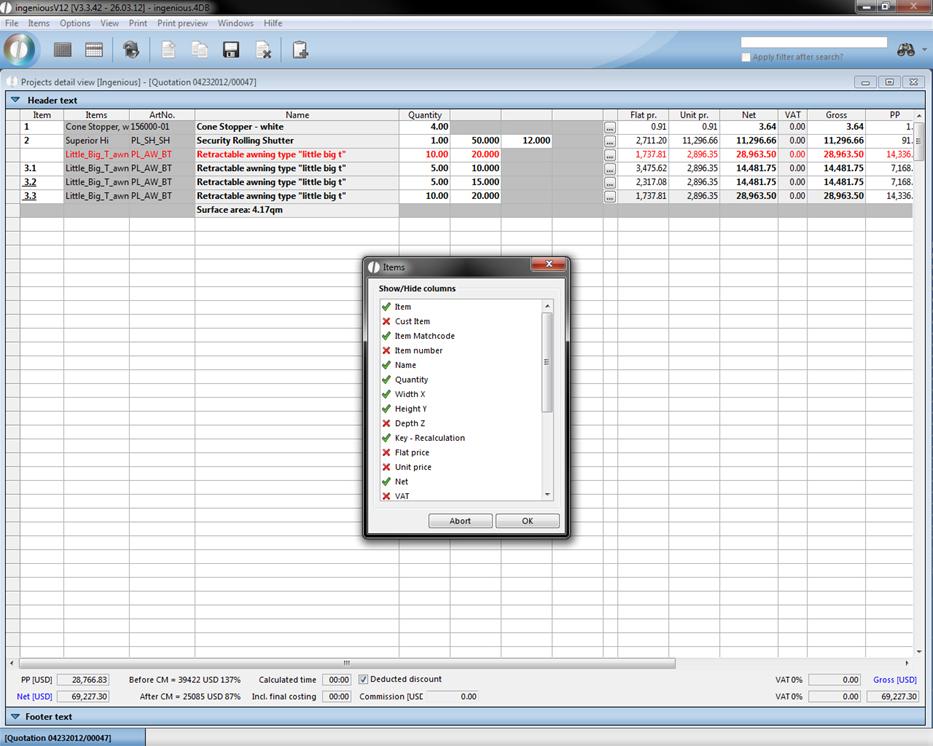
Change table view
You can confirm the layout of the table view with the “View” menu.

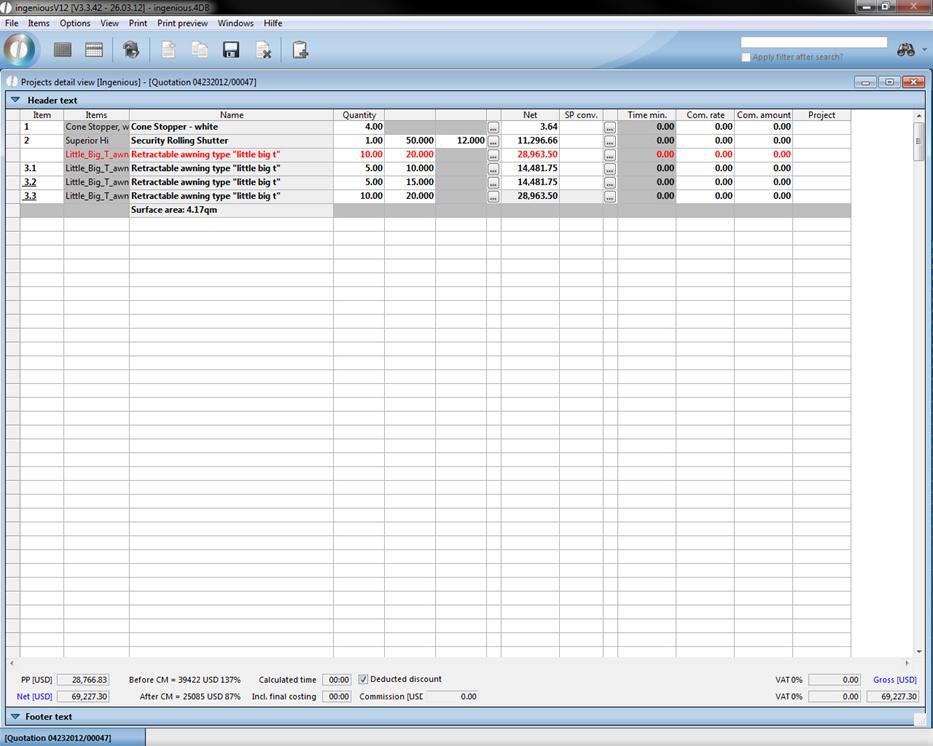
If you click on the function “Administer columns”, a window opens in which you hide and unhide the desired columns with a mouse click. If you hide the columns for the flat price and unit price, these are no longer illustrated in the item view.
In addition, you have the possibility to adapt the column width to your individual wishes. If you want, for example, the column, “Description” to be broader, then pull this over the column head on the desired size and select the function “Note column view” in the “View” menu. Confirm the appearing dialog window with “Accept”. Now the selected column settings are carried over for all projects.
For the setting of the line height there are two possible options: “Automatically adjust line height” leaves a line break within a cell (multi-line cells are possible) and the “Standard line height” corresponds to a line (standard).
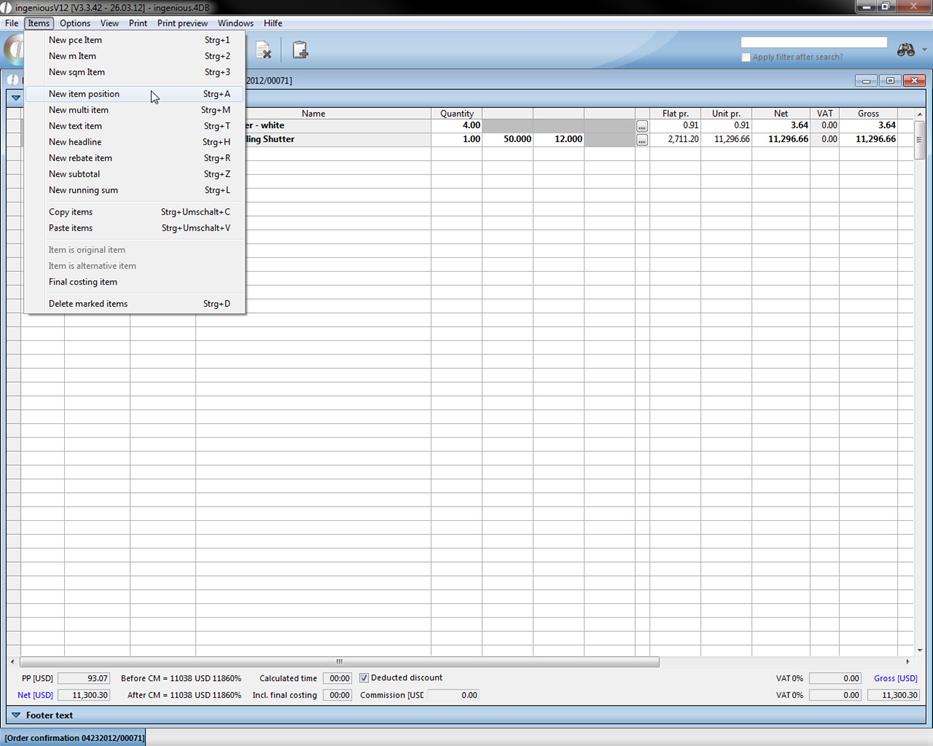
Some of the functions in the “Items” column are also retrievable with key combinations. The key combinations are indicated in the menu next according to the function.