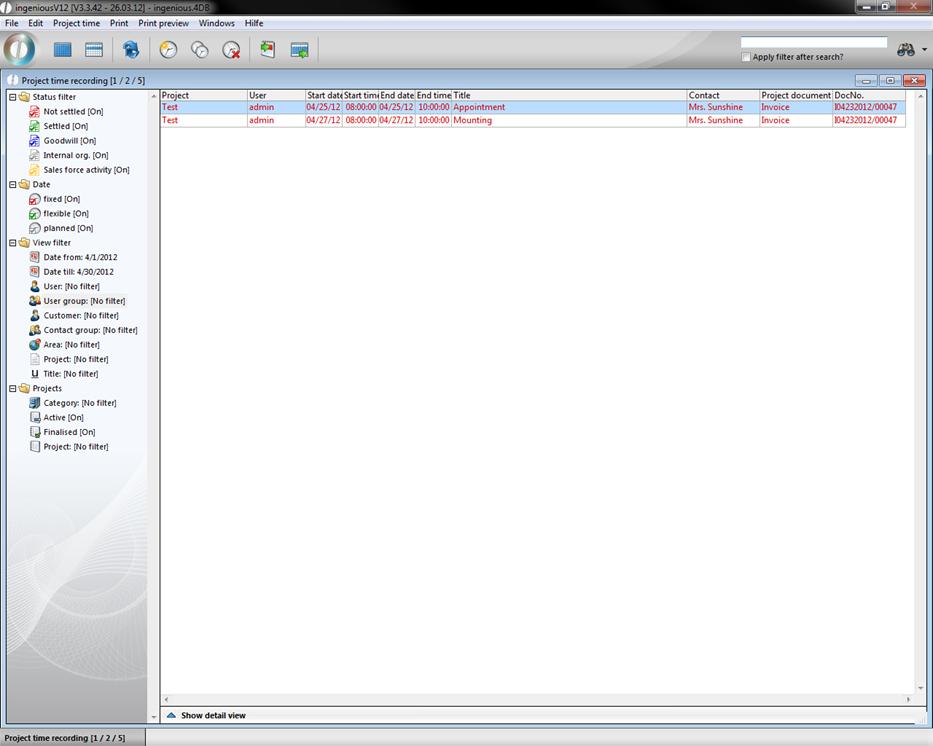
Employee's hours should be assigned to the single projects for post calculation and report purposes. Thus the real accrued hours, such as for example goodwill services or times, are summarized for guarantee work against which even only the agreed calculable times appear in the calculation.
Time entry
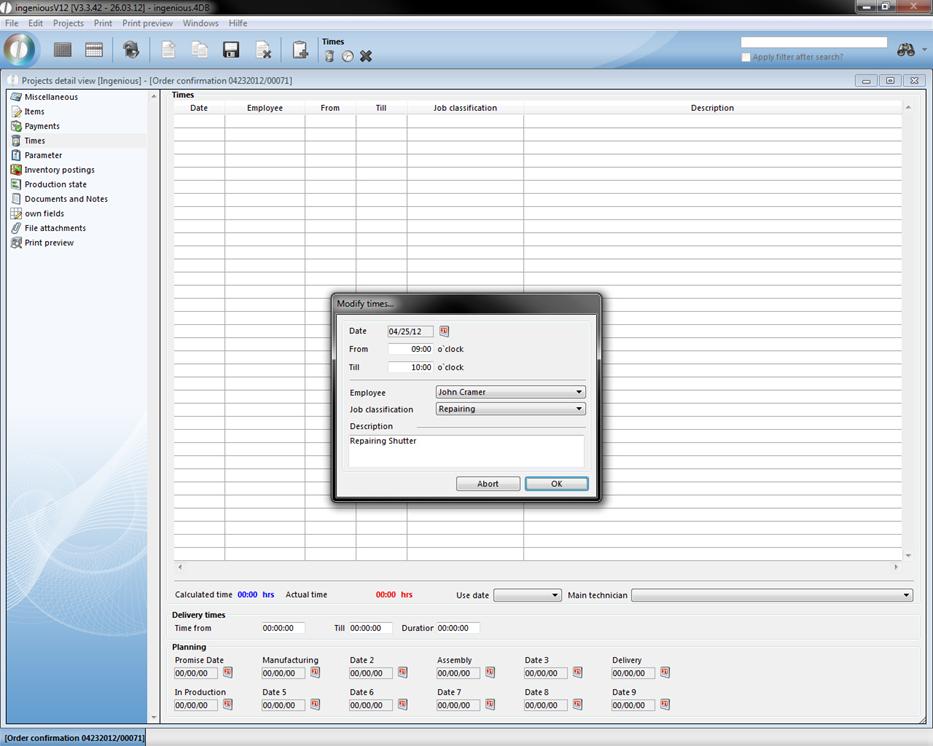
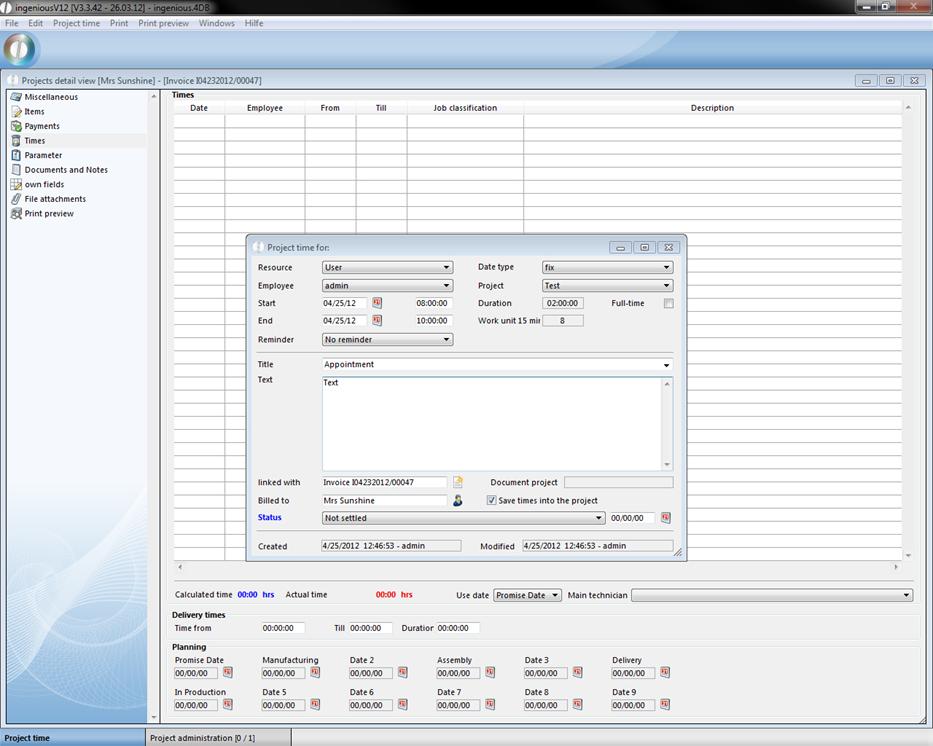
Click on the ![]() icon to summarize a new time entry. In the template that appears, you enter the data and assign the activity to the groups and the respective employee.
icon to summarize a new time entry. In the template that appears, you enter the data and assign the activity to the groups and the respective employee.
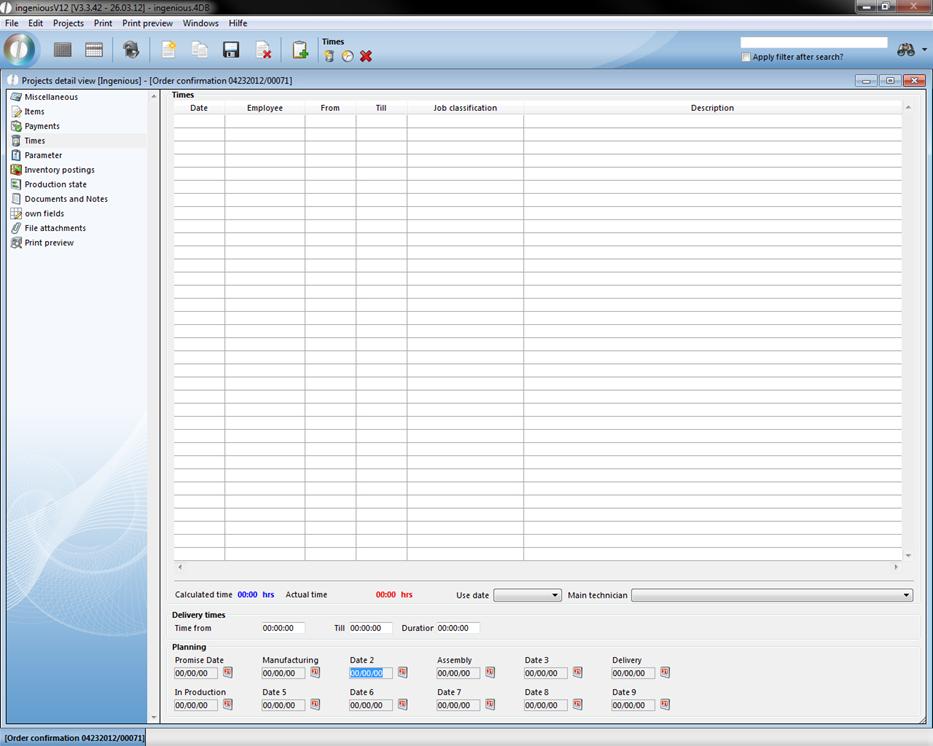
In the area below, the updated times are shown. The calculated hours and are show in blue and real times are indicated in red. The calculated time is taken from the item positions with a price/time ratio from the project and the real times are entered manually as described above. In the planning, you can insert the announced date for the order progress. By clicking on the icon, a calendar from which you can choose the date opens. Here you enter up to which appointment, i.e. the finished products must be made. These data are recalled among others in the logistics with the setting of trip lists.

Project time entry with the use date
In the workflow areas (Sales, production, logistics and invoicing) one can create and enter project time entries in different projects (Quotation, confirmation order, invoice, etc.) which are automatically taken into consideration with the time management. Thus it is possible to administer project relevant appointments, such as measurement appointments or assembly appointments, directly through the project. This makes the appointment planning more clear and more flexible.
Practice “Create project time entry with use date”
1. In the sales list view select an invoice by double-clicking.
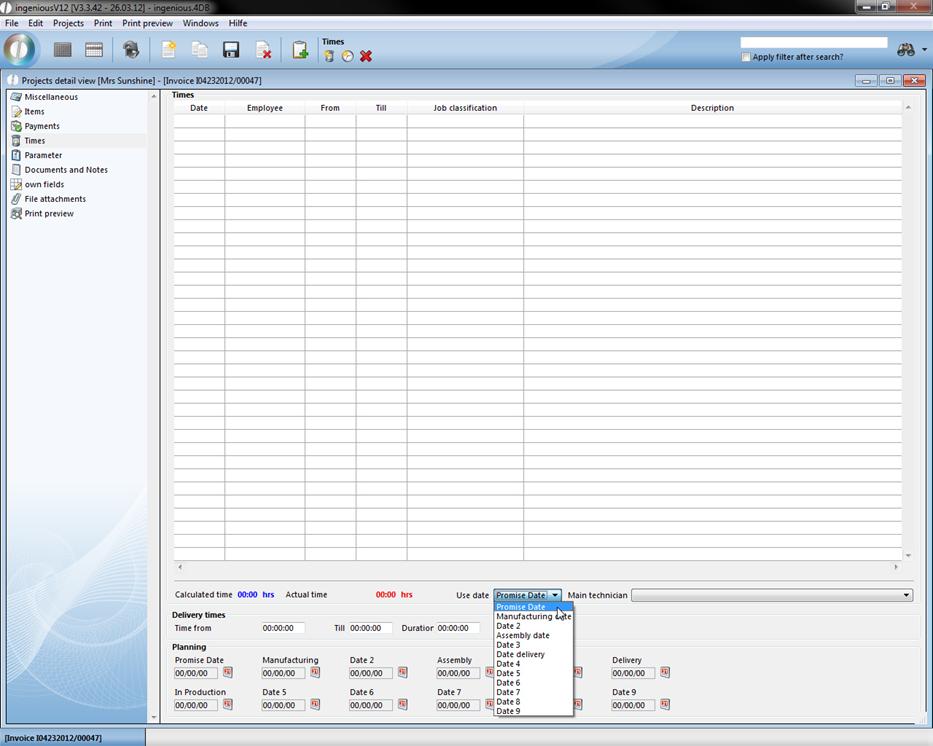
2. In the project detail view, choose the area “Times”. In the field “Use date” select the option “Promise Date” and enter the desired date in promise date in the planning area by clicking on the calendar icon ![]() . Now you still select the use date “Manufacturing date” and also confirm it here.
. Now you still select the use date “Manufacturing date” and also confirm it here.
3. Pay attention to the fact that in the field “Use date” that date 1 is positioned again. If you now create a new project entry with the ![]() icon, the selected date for the appointment is automatically transferred. Please fill in the time entry as illustrated.
icon, the selected date for the appointment is automatically transferred. Please fill in the time entry as illustrated.
4. Finish the entry with the ![]() icon and confirm with “OK” in the window that appears in order to save the entry. Now select the “Manufacturing” appointment as a transfer date and create a new project entry again. The date of the manufacturing appointment is also automatically transferred here.
icon and confirm with “OK” in the window that appears in order to save the entry. Now select the “Manufacturing” appointment as a transfer date and create a new project entry again. The date of the manufacturing appointment is also automatically transferred here.
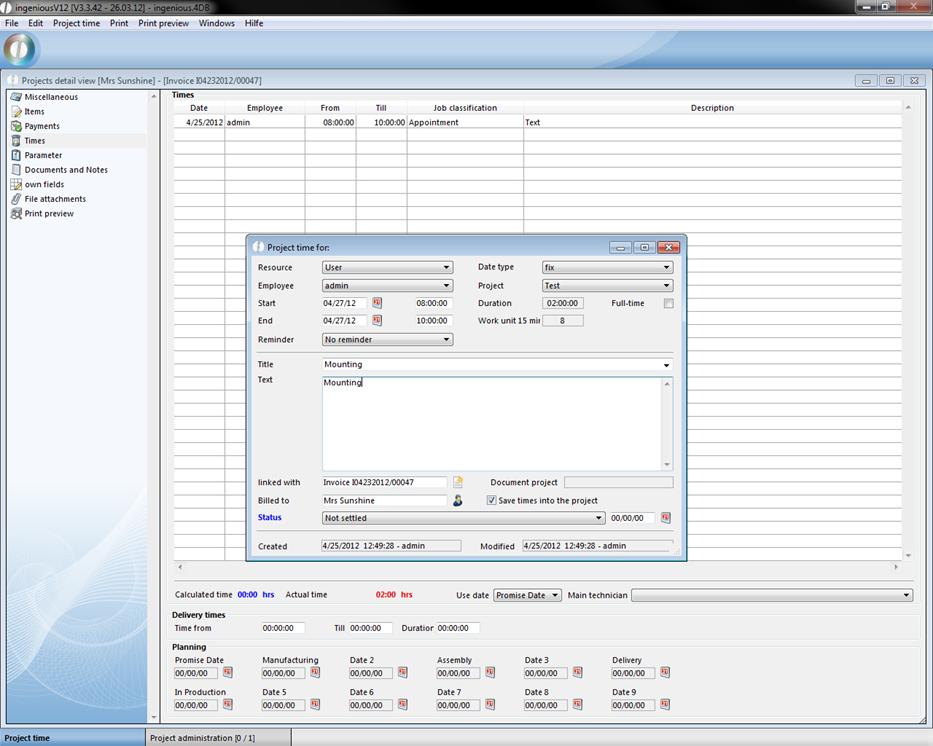
5. Save the appointment and leave the project detail view. Now open the administrative tools “Time Management”. Here you see the time entries created by you. You have the possibility to edit and manage all appointments created in the projects with the Time Management.