The “Trips” menu offers you the possibility to create diverse trips and to determine on which day of the week they should occur.

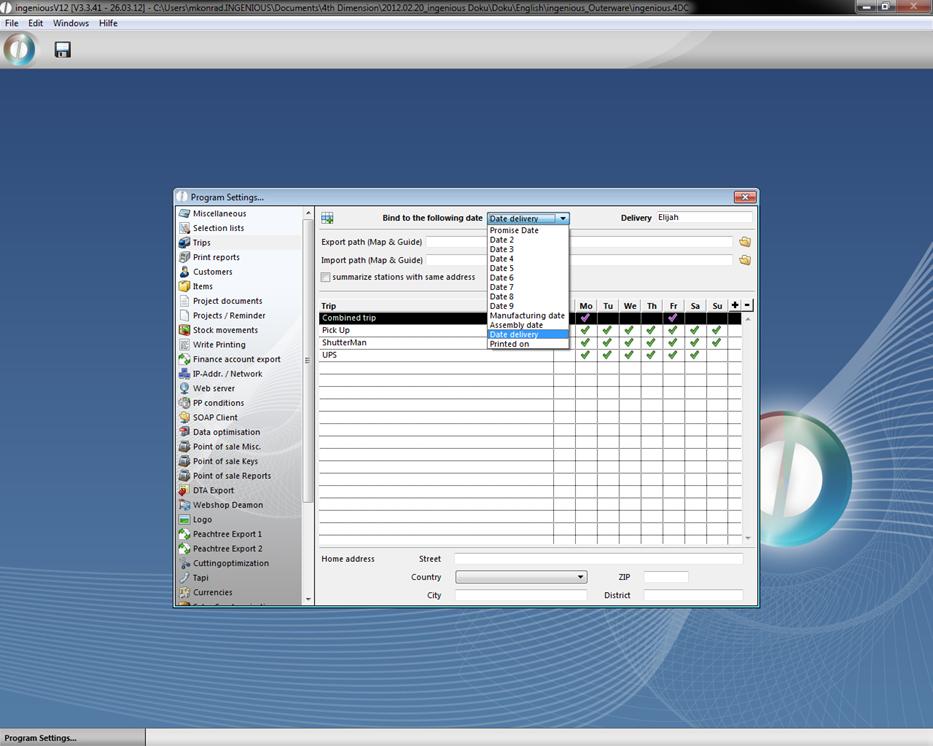
In the upper list field, you can determine the desired trip appointment connection. Here you access the available appointment times in the column “Times” from the “Workflow” module.
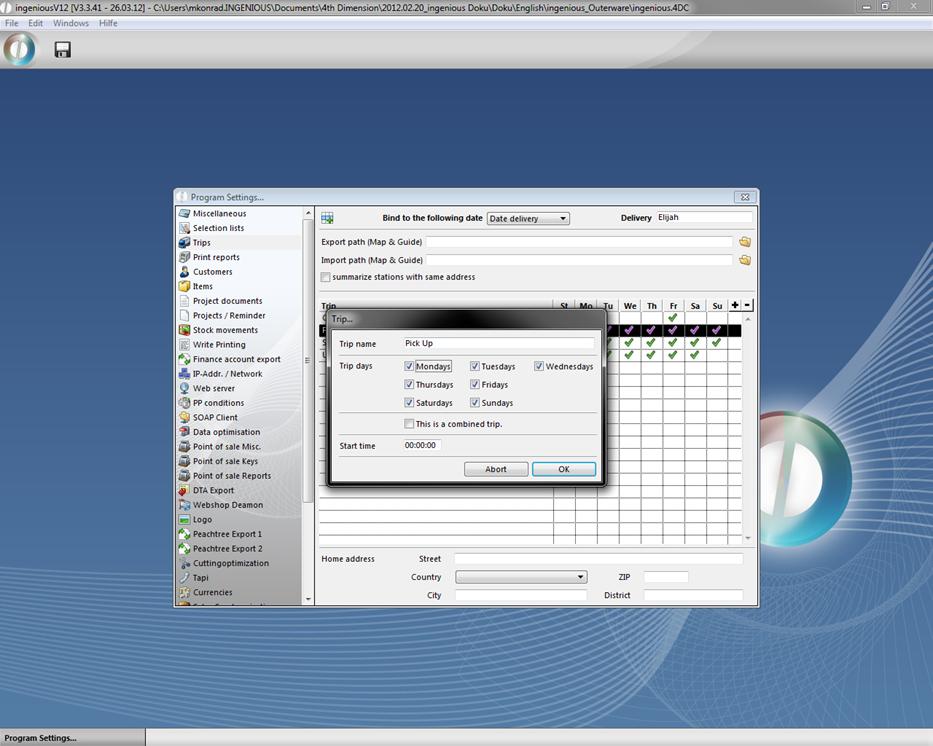
With the ![]() button, you can create a new trip and determine its name and the day on which it will occur in the window that appears. You can also determine if there should be a collective trip. With
button, you can create a new trip and determine its name and the day on which it will occur in the window that appears. You can also determine if there should be a collective trip. With ![]() a route can be deleted.
a route can be deleted.
When you create a new project, in the column “Miscellaneous” in the field “Trip” and/or “Collective trip”, you determine to which route the project should be linked. If the project will be forwarded later, appointment times can be changed in the column “Times”. Central management of collective trips is also possible.
Trip Management Assistant
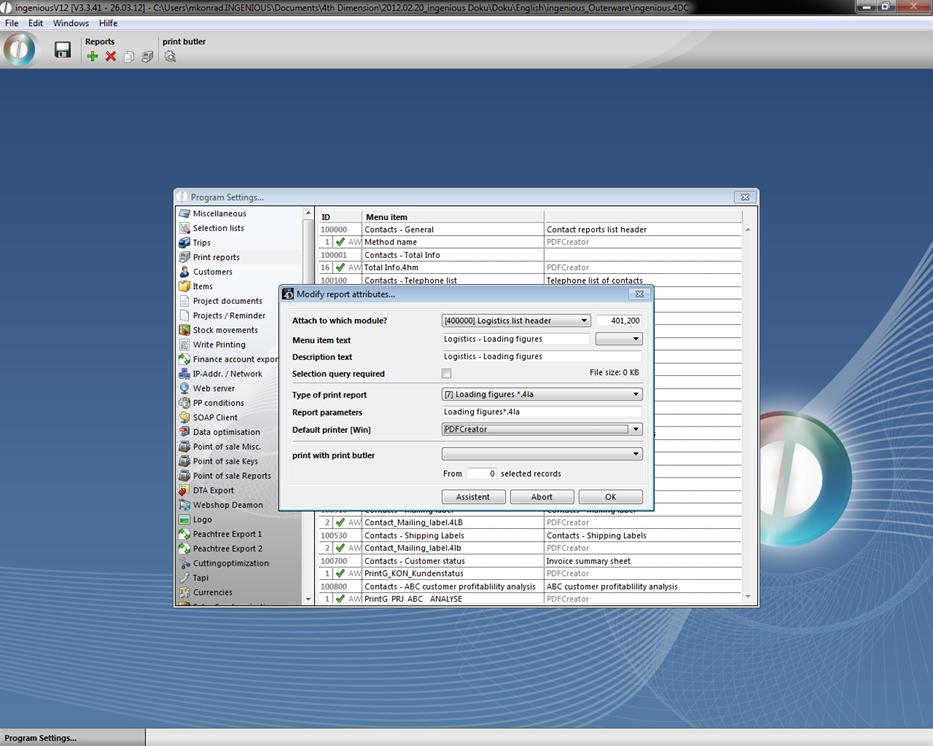
The Trip Management Assistant is a function of Ingenious.V12 that helps you configure a trip list and/or a freight list in which certain goods with amount, measurements and weight can be recorded. With this list, you can optimize the loading of your vehicles. Create a new report with the ![]() button. In the “Module” field, select the option “Logistics list header”, and complete the remaining fields shown in the following image.
button. In the “Module” field, select the option “Logistics list header”, and complete the remaining fields shown in the following image.
Subsequently with the “Assistant” button, you can open the trip management assistant. With the ![]() “Export script to the file” and “Import script from the file”
“Export script to the file” and “Import script from the file” ![]() buttons, you have the possibility to export or import trip lists. Click on
buttons, you have the possibility to export or import trip lists. Click on ![]() to create a new list identifier. A new window opens in which you enter the column headline. In the column “Matchcode” you either enter the article matchcode or you click on the
to create a new list identifier. A new window opens in which you enter the column headline. In the column “Matchcode” you either enter the article matchcode or you click on the ![]() button and select from the catalog by double-clicking the desired article. In the “Loading dimensions” column, enter the needed loading surface. In the “Sum string for measures” field, you can quote how the loading measurements should be calculated and exported. For the calculation of the sum string, all formulas used in Ingenious.V12 are at your disposition. The instructions for the article are compiled in the capacity list in the columns “Article”, “Weight” and “Measurement”. You have the possibility to add other blank columns. In the last field, you enter the column title and then the column width in pixels, separated by a semicolon. In this way, you can add a discretionary number of blank columns.
button and select from the catalog by double-clicking the desired article. In the “Loading dimensions” column, enter the needed loading surface. In the “Sum string for measures” field, you can quote how the loading measurements should be calculated and exported. For the calculation of the sum string, all formulas used in Ingenious.V12 are at your disposition. The instructions for the article are compiled in the capacity list in the columns “Article”, “Weight” and “Measurement”. You have the possibility to add other blank columns. In the last field, you enter the column title and then the column width in pixels, separated by a semicolon. In this way, you can add a discretionary number of blank columns.
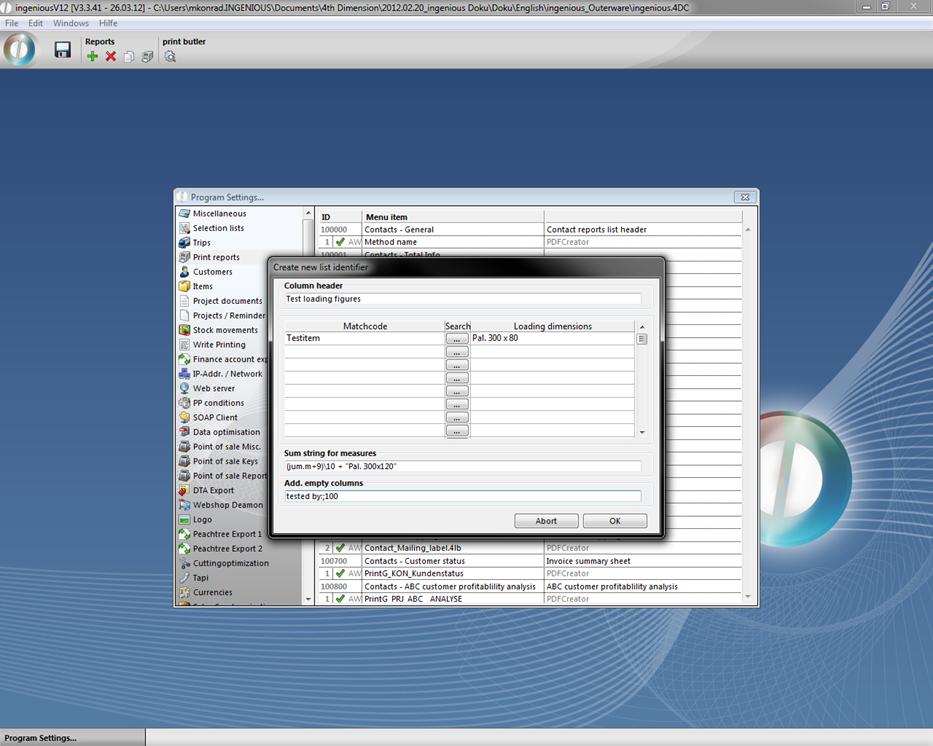
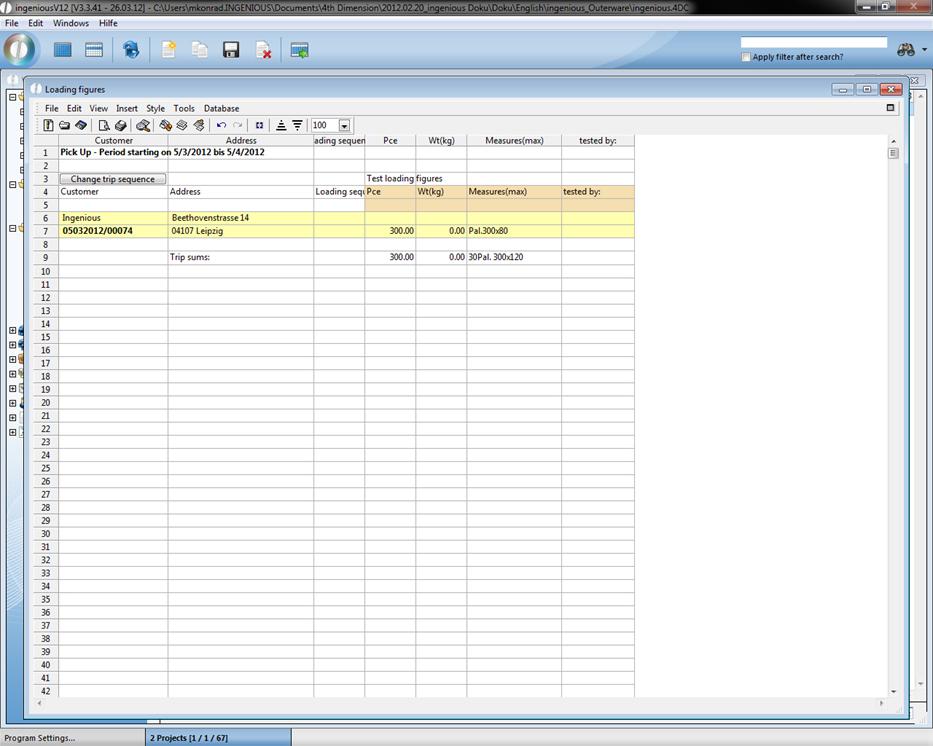
In the pictured example, shutter casings of synthetic material are loaded on pallets
(300 x 80 cm). The vehicle is always loaded with transport pallets. Ten shutter casing pallets fit on a transport pallet of 300 x 120 cm. That is why (jum.m+9)\ 10 “Pal. 300 x 120”is always in the sum string. One calculates the number of the synthetic roller shutter casings plus 9, getting the integer (without remainder) divided by 10. In this manner, one gets the rounded number of the transport pallets. The content in quotes will be displayed in a normal text. That means if four shutter casings should be loaded, one calculates 4+9=13 and 13:10=, remainder 3. The remainder will not be applied. Therefore, one transport pallet is needed. By simplifying the example and assuming that 10 pallets fit on one pallet and 12 pallets need to be transported, then two vehicles are needed, for 12+9=21 and 21: 10=2, remainder1.
When all settings are in place and confirmed, the column headline is displayed in the trip management assistant. In case you would like to work on your entries, double click on the headline and you will get the editing window. Exit the assistant and the program settings and save the settings. In the user administration, activate the appropriate report rights. Now a loading capacity list will be displayed in the workflow modules. Now go to the menu and click “Print” for the list.
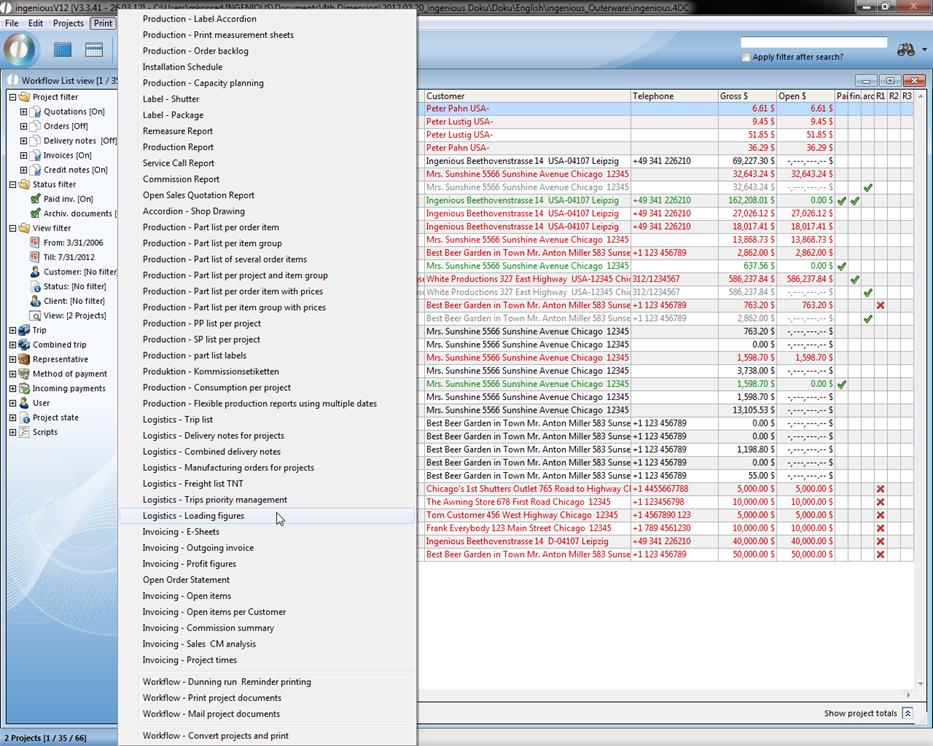
When you select the function “Logistics - Loading figures”, and select the desired options in the print setting window, the “Select trip…” window will open.
Here you first select the trip for which a list has to be created (in this case route 2). In the “Print” field, you can determine which project documents have to be considered. You also can determine the time period that has to be calculated. You also have the possibility to sort the specifications according to the client, manufacturing date or delivery sequence. When you have made all the adjustments, click on the “Next” button. The window “Loading figures” in which all addresses of clients who will receive the articles determined by you in the selected trip will open. You can print the loading figures list by clicking on the “File/Print” menu or with the ![]() button.
button.