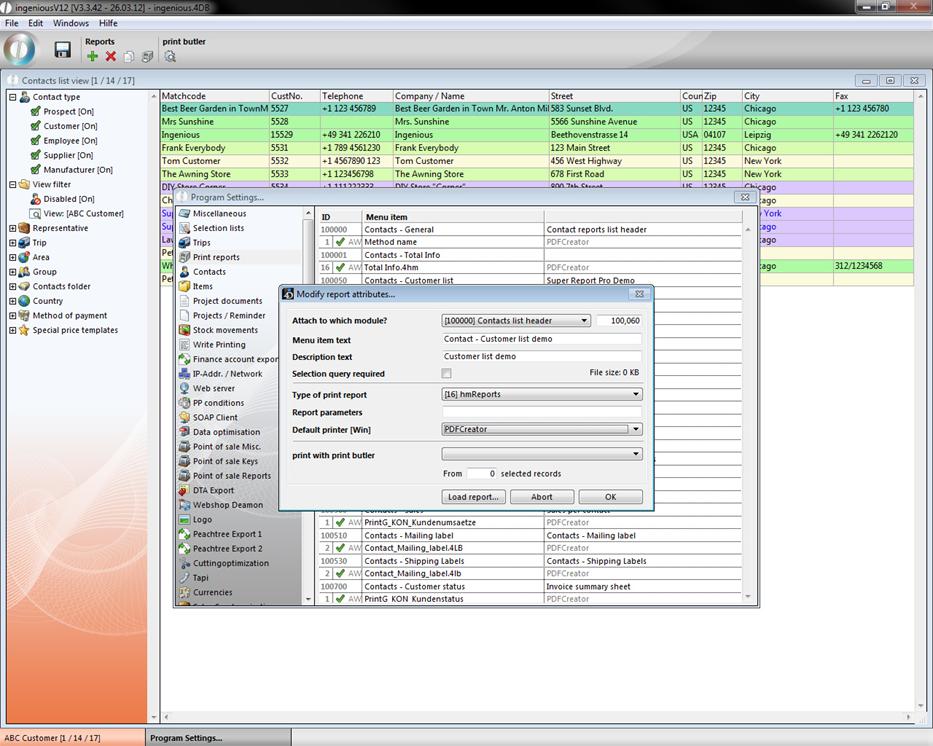
hmReport is a new plugin to create reports, which you can buy at Ingenious GmbH. In the program settings it can be assigned to any module with the print report “[16] hmReport”. In the following example a hmReport named “Contact – Customer list” for the module “Contacts” is created. If you want to load a existing report, you can do this by clicking “Load report…”
When you have created the print report, you have to enable the corresponding user- and report right, to be able to use the report.
Now you can select the created report in the menu “Print”. Meanwhile hold down Ctrl and Shift to get into the modification mode of the report.
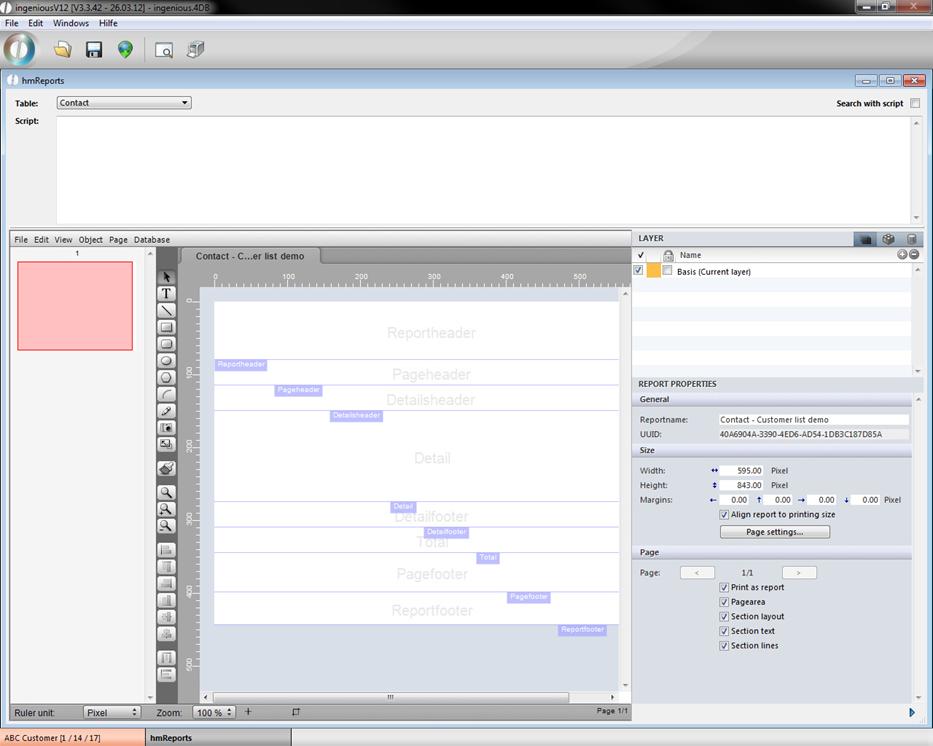
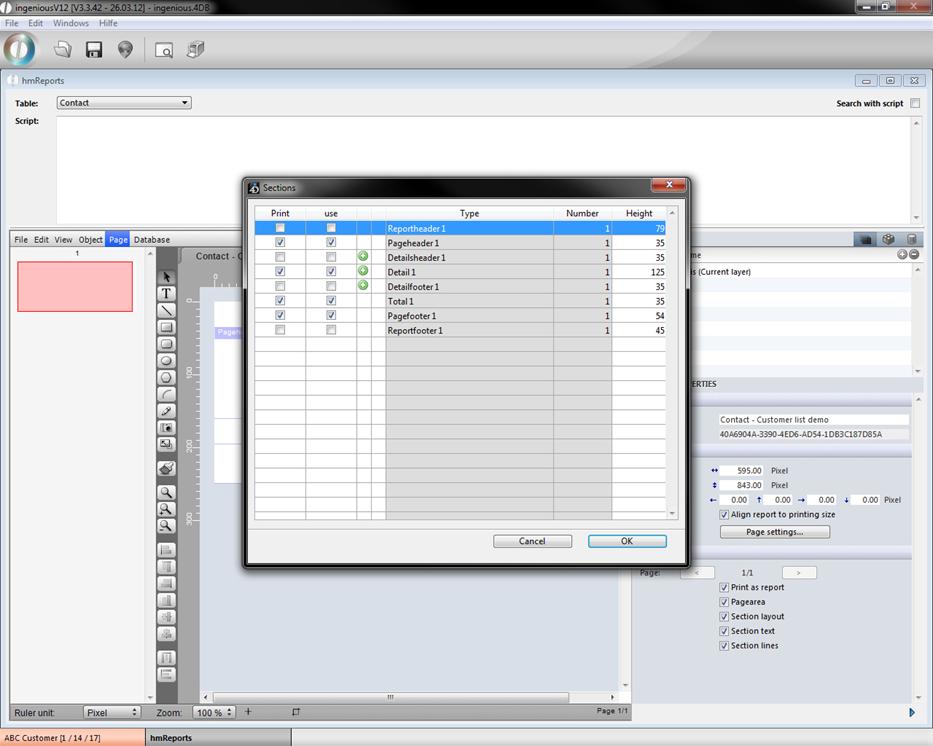
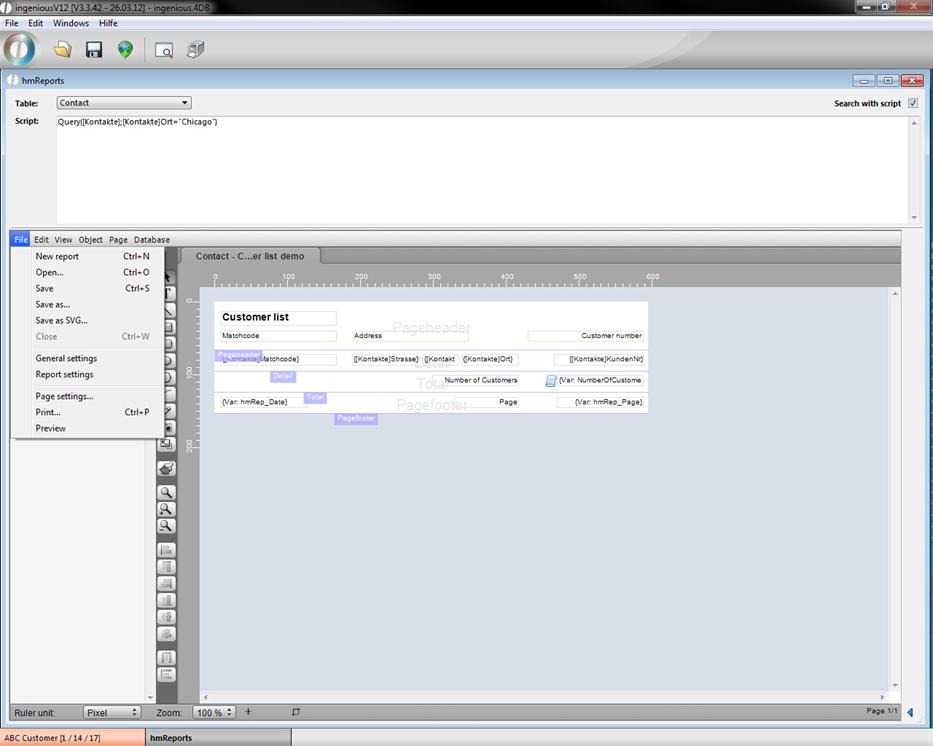
The hmReport window will open up. In the upper area you can choose the desired table, the report should refer to and add a script if necessary. In the lower area you can build an individual report with the help of the several menus, buttons and property bar (in the right area; to hide it click on ![]() ). The document contains many areas Reportheader, Pageheader, Detailsheader, …. For this example open menu -> page -> sections and do the following settings in the window:
). The document contains many areas Reportheader, Pageheader, Detailsheader, …. For this example open menu -> page -> sections and do the following settings in the window:
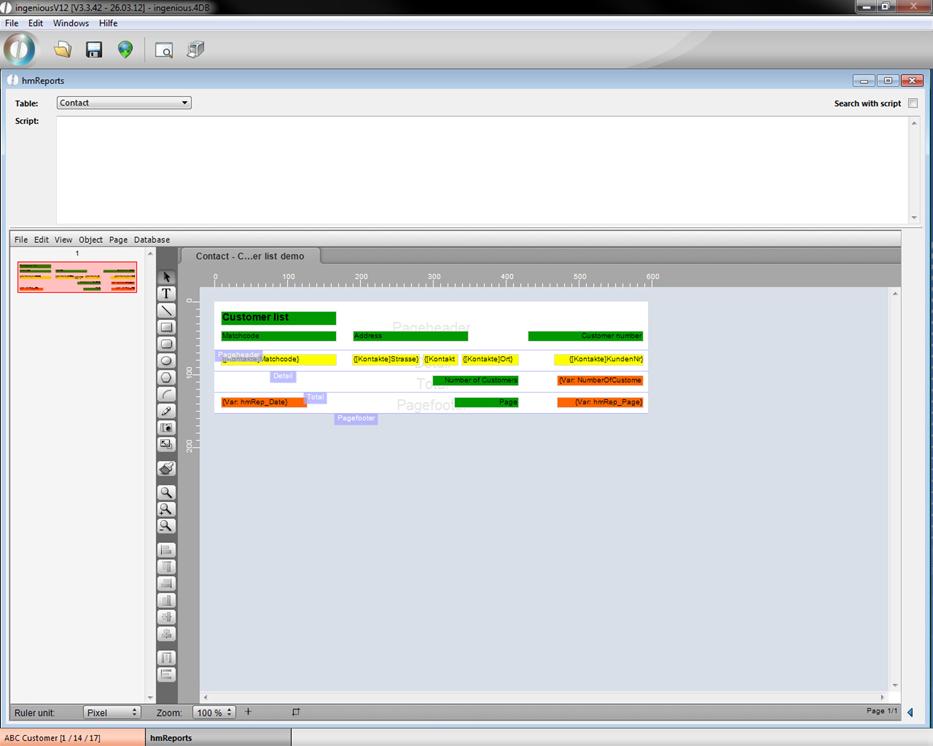
For a better understanding in the following example the text areas will be displayed in green, database fields yellow and variables orange.
With the button ![]() you can create a field. By double clicking the field the configuration window will be displayed, where you can choose what kind of field it is (static text, variable, array, …).
you can create a field. By double clicking the field the configuration window will be displayed, where you can choose what kind of field it is (static text, variable, array, …).
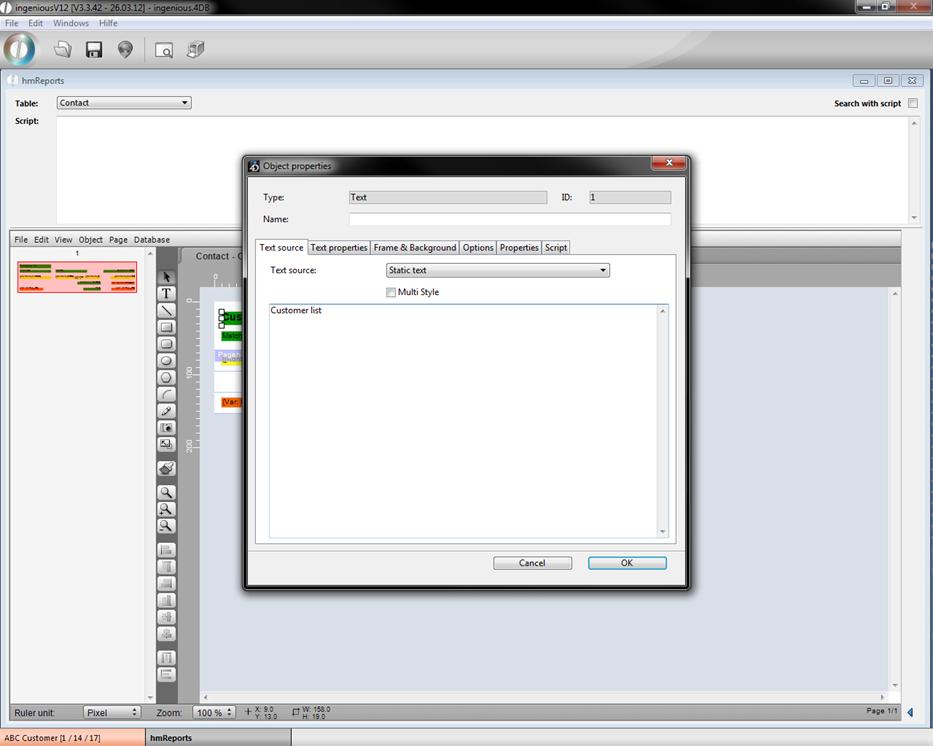
Modification window for a static text field
When you choose “Internal database” as the text source, you can choose the table and field the value comes from.
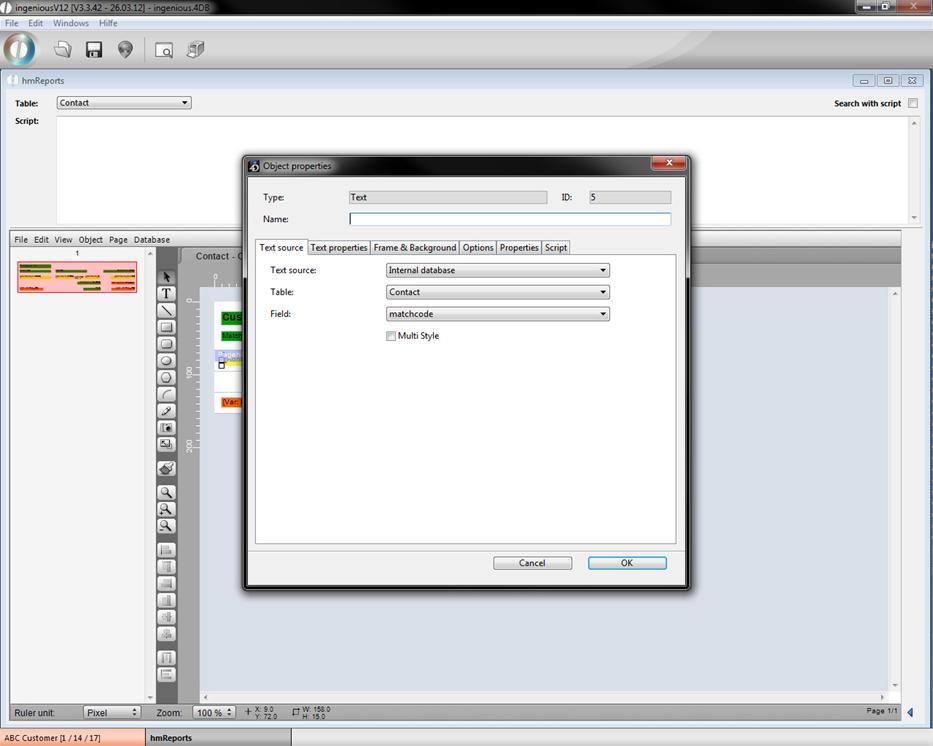
Modification window for an internal database field
If you choose “variable” as text source you have to enter a name in the field “Variable name” and can change the value of it per script. There are also some reserved names for variables containing several predefined functions. This names are “hmRep_Date” (to display the current date); “hmRep_Time” (to display the current time); “hmRep_Record” (contains the current iteration number) and “hmRep_Page” (to display the current page number).
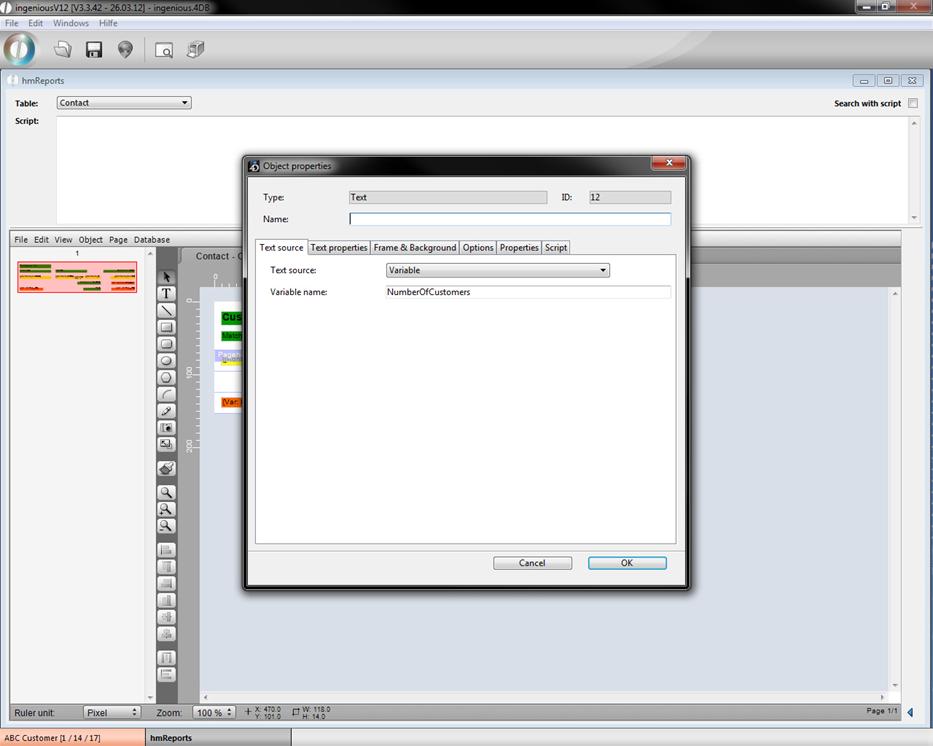
Variable “NumberOfCustomers”

Predefined variable “hmRep_Page”
In the tab “Script” you can add a script, for instance to fill the current variable. In the following example the script saves the number of number of displayed records from the contacts table in the variable “NumberOfCustomers”

Script that changes value of “NumberOfCustomers”
You can also execute a script before the report is created, for instance to filter for the records you want to display. In the example a script was added that filters the contacts for the one that live in Chicago.
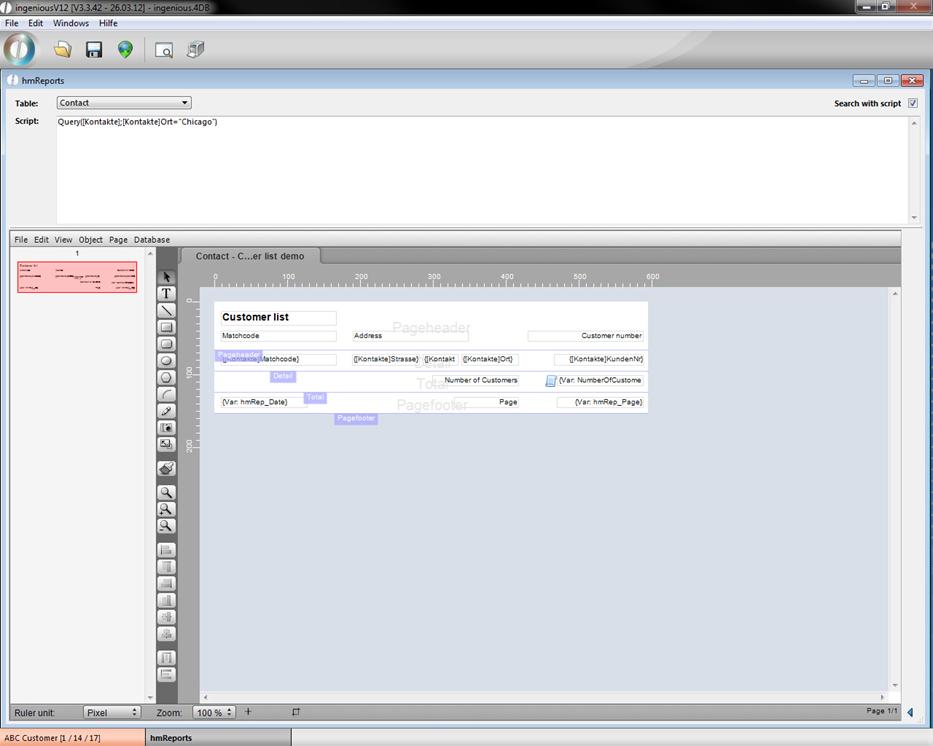
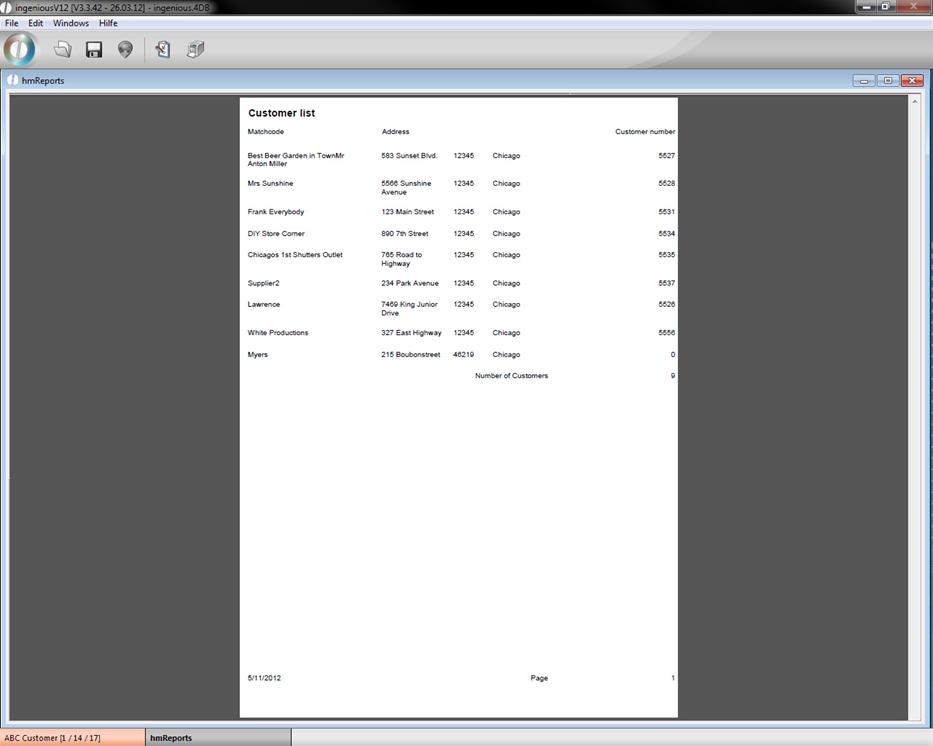
By clicking the button ![]() the print preview will be created. For the example it will look like this:
the print preview will be created. For the example it will look like this:
When you click on the button ![]() you will switch back to modification view of the report; or you can directly print it by clicking the printer icon
you will switch back to modification view of the report; or you can directly print it by clicking the printer icon ![]() .
.
Menu bar
File…
… New Report Create a new report
… Open… Open a report from disk
… Save… Save current report to disk
… Save as… Save current report to disk
… Save as SVG… Save report as SVG file
… Close Close tab of report (if it contains multiple pages)
… General settings Settings for the report editor
… Report settings Settings for the report
… Page settings… Settings for the printed document
… Print… Print report
… Preview Open preview of the report
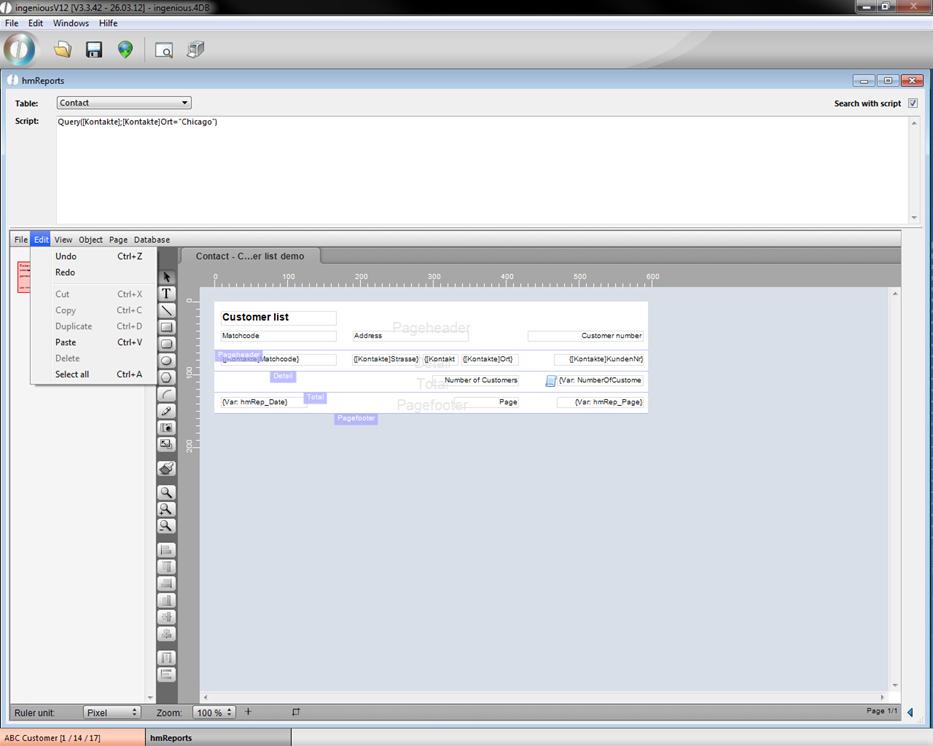
Edit…
…Undo Undo modification
…Redo Redo modification
…Cut Cut selected object(s)
…Copy Copy selected object(s)
…Duplicate Duplicate selected object(s)
…Paste Paste clipboard content
…Delete Delete selected object(s)
…Select all Select all objects
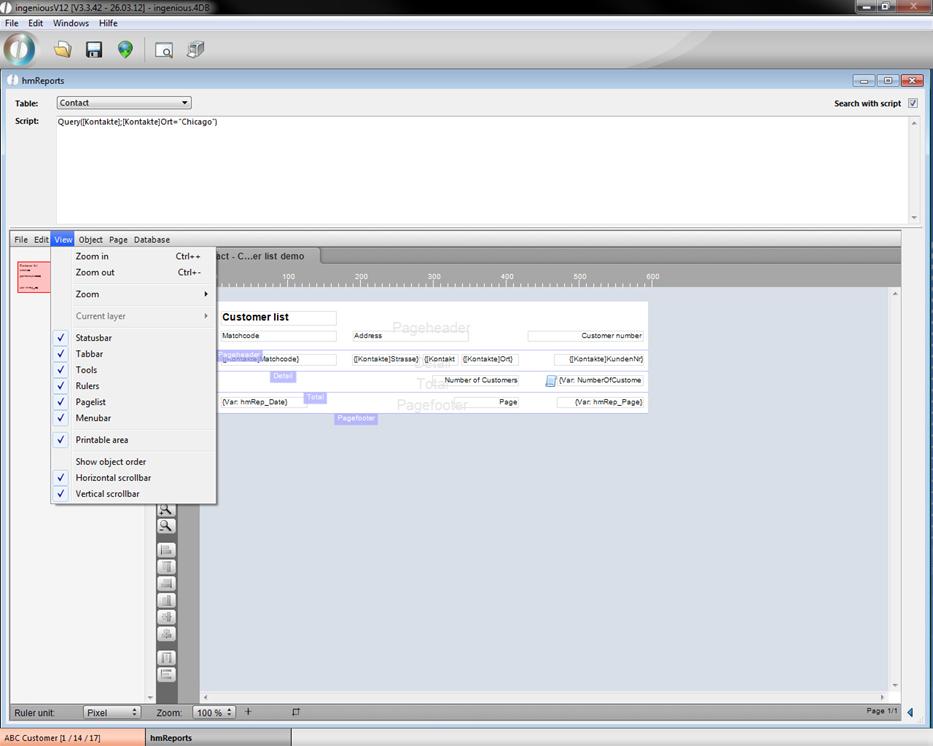
View…
… Zoom in Increase the zoom factor
… Zoom out Decrease the zoom factor
… Zoom… Select predefined zoom factor
… Current layer Select the layer you want to modify
The following menu entries will toggle the visibility of the named window objects
… Statusbar
… Tabbar
… Tools
… Rulers
… Pagelist
… Menubar
… Printable area Show/hide border of the printable area
… Show object order Show/hide object order number
… Horizontal scrollbar Show/hide horizontal scrollbar
… Vertical scrollbar Show/hide vertical scrollbar
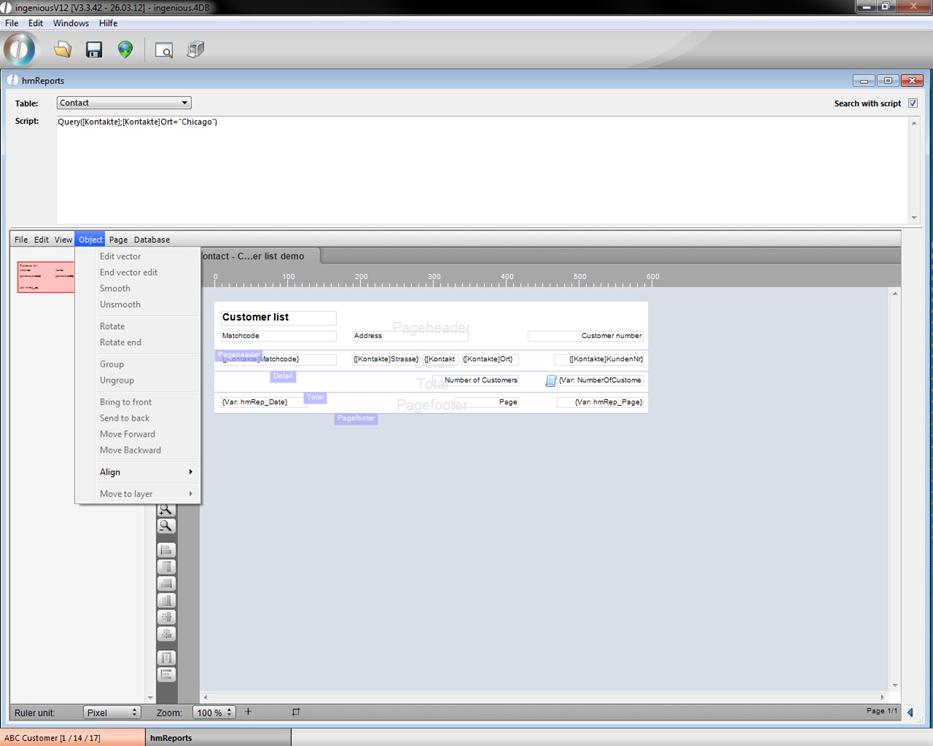
Object…
… Edit vector Modify a vector graphic
… End vector edit Modification finished
… Smooth Make vector graphic smoother
… Unsmooth Make vector graphic unsmooth
… Rotate Rotate object
… Rotate end Rotation finished
… Group Group selected objects
… Ungroup Ungroup selected objects
… Bring to front Move selected object to the front
… Send to back Move selected object to the background
… Move forward Move selected object one layer up
… Move Backward Move selected object on layer down
… Align… Set the alignment of the selected objects
… Move to layer… Move object(s) to certain layer
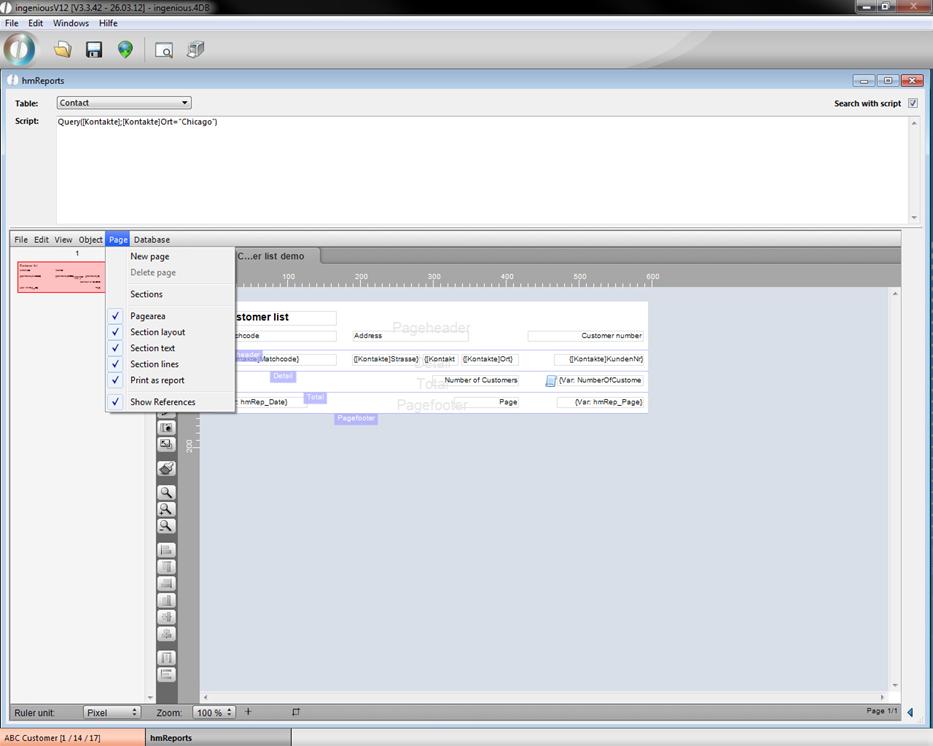
Page…
… New page Add page to report
… Delete page Delete page from report
… Sections… Manage the sections of the report
… Pagearea Hide/unhide page border
… Section layout View only sections/whole page
… Section text Hide/Unhide section texts
… Section lines Hide/Unhide section lines
… Print as report Print report as report (objects will be replaced with values) or not
… Show references Show references or resolved values
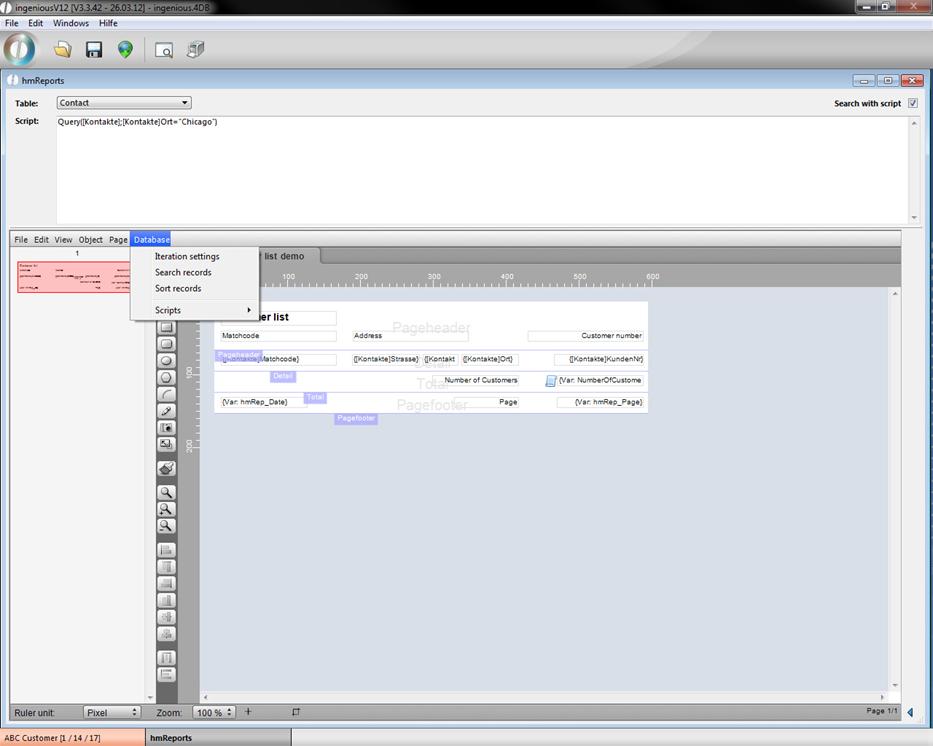
Database…
… Iteration settings Define how often the detail section should be repeated (here contact record number)
… Search records Look for certain records
… Sort records Sort selected records
… Scripts Add scripts to events/sections
Useful script functions
|
Syntax |
Descriptiong |
Example |
|
Result:=My_Request("Question") |
Opens a request dialog where the user has to enter string |
city:=My_Request("Which city should be considered?") QUERY([kontakt];[kontakte]Ort=city)
|
|
My_Confirm("Question”)
|
Opens a yes/no dialog
|
My_Confirm("Only display documents, that were printed today?") If(OK=1) QUERY([Projekte];[Projekte]Gedruckt am=Current date()) Else ALL RECORDS([Projekte]) End if
|
|
CW_SetPrefs CW_SetDate(Current date) CW_OpenDialog |
Opens the date picker
|
CW_SetPrefs CW_SetDate(Current date) CW_OpenDialog If(OK=1) QUERY([Projekte];[Projekte]Gedruckt am=cwSelectDate) End if
|